Hello! My name is Connie Kresin Campbell and I blog at Freemotion by the River. I'm excited to share a tutorial here at Inspired by Fabric using these beautiful Marblehead Pleasing Pastel fabrics.
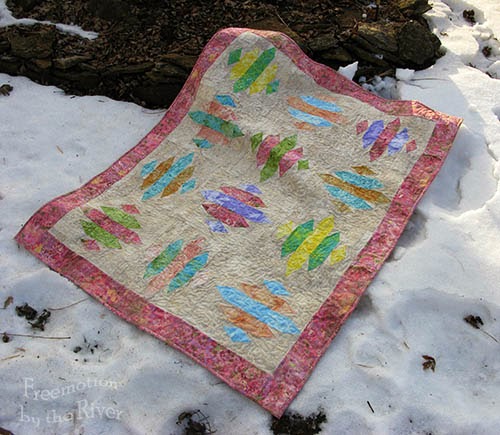
I always enjoy taking my quilts outside if the weather and wind cooperate. I live right along the Mississippi River in Iowa and haven't lost a quilt yet.
I put the quilt up on a window before I quilted it and it looks like stained glass.
The block has quite a few pieces but is very easy to put together. I used my Tri Rec rulers, if you don't have them the AccuQuilt die Triangles in Square 2" will work, or you can download my templates here.
I used a bundle of 2-1/2" pre-cut strips plus some additional yardage of Marblehead Pleasing Pastels by Ro Gregg.
Fabric requirements for this 42" x 54" quilt:
Each block is 12-1/2" square unfinished
Quilt uses 12 blocks
- 1 jelly roll of Marblehead Pleasing Pastels
- 1-5/8 yd of #120-42924 Creme
- 1-1/4 yd of #120-42921 Pink
- 1-3/4 yd Backing piece, I used muslin
- Batting, I used Warm & Natural
You will use two 2-1/2" strips in colors of your choice to make your block. You can get 2 blocks out of these 2 strips if you use the cutting info below for one and then switch the colors for the next.
For example this block shows a pink center, cut all the pieces and then cut another, reversing the colors to a teal center. If you want more variety there are enough strips to make blocks by just choosing 2 colors.
For each block cut the following: I am going to use pink and teal as an example.
- Pink - one 2-1/2" x 8-1/2" and 6 - triangles
- Teal - two 2-1/2" x 4-1/2" and 4 - triangles
- Creme - four 2-1/2" squares, four 2-1/2" x 4-1/2", two 1-1/2" x 12-1/2" and 20 side triangles
Cut your triangles with the Tri-Rec tools at the 2 1/2 inch line or use my templates.
When you cut the side triangles, be sure and keep the strip doubled with wrong sides together so you will get mirrored images....one for each side of the pink triangle. Use the 2-1/2" line on the template.
If you use the Tri-Rec be sure and cut the little corner piece, it will help you match your pieces.
Here is a photo to show you how to line up the side triangle pieces.
I like to make all the pieces using the triangles and side triangles first. I used a 1/4" seam allowance while making the entire quilt.
Here are all the triangle pieces for one block.
Start sewing your sections of the block together.
Add a 1-1/2" x 12" strip to 2 sides of the block as shown.
Here is a diagram showing the sizes of the pieces in each section.
Here is your block all pieced! Now just make 11 more for your quilt.
Here are my blocks all pieced together.
Follow the diagram below to put your blocks in rows.
I used the pink for a 3" border and the binding, which I cut 2-1/2" wide.
You can really see on this diagram where I reversed the order of the color of fabrics....for example see the green/yellow block? One has the yellow in the center and the other has the green in the center.
I hope you enjoyed the tutorial! Now, how about a giveaway?!?
One lucky person will receive this beautiful strip set of Marblehead Pleasing Pastels by Ro Gregg that Fabri-Quilt is giving away. Head over to Connie's blog to help her name her quilt and see how you can enter to win the bundle!


