Tuesday, December 15, 2015

Day 6: Home for the Holidays Blog Hop

Welcome to the sixth day of our Home for the Holidays blog hop! 
This week we'll be featuring a variety of small sewing projects to add holiday cheer to your house. These are fast and easy--you can still make them for this year, or bookmark the tutorial until after the holidays! We hope you enjoy these tutorials--and don't miss a chance to win a bundle of the fabrics featured each day!


Today Dawn from Spring Water Designs is here sharing a snowflake table topper made using Ro Gregg's Peace on Earth collection. We love the large off-center fused snowflakes showcased on the beautiful coordinates in Ro's collection.

Here's Dawn:
This week I got to play with these luscious fabrics from Ro Gregg's Peace on Earth fabric line to make something for the Inspired by Fabric's Blog Hop :)


I decided to make a Holiday Table Topper for my dining room table.

To make it, you'll need:

1/2 yard of the Large Holiday print for the borders, cut:
     (2) 4-1/2" x 30-1/2" strips
     (2) 4-1/2" x 18-1/2" strips

1/4 yard of the Green Diamond print, cut:
     (4) 6-1/2" squares

1/4 yard of the Pink Diamond print, cut:
     (4) 6-1/2" squares

1/4 yard of the Dark Green print, cut:
     (1) 6-1/2" square
     (4) 4-1/2" squares

1/2 yard Cream with round snowflakes for setting squares, cut:
     (6) 6-1/2" squares

3/8 yard Red print for binding, cut:
     (4) 2-1/2" WOF strips

1/2 yard of Cream Textured print for applique snowflakes


First to start, arrange your squares in rows in the configuration shown in the above photo. (Or switch out the green and pink diamonds if you prefer ~ it's your table topper!)


After applying fusible web to the back side of some of the light textured fabric, I cut 8 snowflake shapes using my AccuQuilt GO! and the Holiday Medley Die #55043.  If you don't have a GO! Cutter, you can use any snowflake shape that you want and scale it 4 - 5" in size.  You can click Here for a link to a blog post from Inspired by Fabrics Home for the Holidays series last week that has some snow flake shapes you can download.


I laid out the snowflakes on the pink and green squares ~ and to give it the look of snowflakes softly falling, I did not center them on the squares, but off-set them on each square.  Play here to find an arrangement that's pleasing to you...and if you like them centered on the squares, that's ok too ~ again, do what you like and have fun :)

Tip: You might want to pin the snowflakes in place once you choose the position of each one on the square, so they don't get shifted around when you are taking them to your pressing station.  Snapping a photo of your overall arrangement is helpful too in case you get things turned around between pressing and sewing.
 
Then using a pressing cloth underneath to protect your ironing surface, fuse the snowflake in the position that you chose on each square.  If you chose to off-set them, let them hang over the edges in some places like the one shown above.  


 Then once fused, trim off the extra snowflake parts that hang over the edge of the square.


I like the effect that occurs of the snowflakes "peeking" through the squares when they are placed on the edges like this.


Next I top stitched on the snowflake from tip to tip across each snowflake.  If you prefer, this step can be done at the quilting stage to stitch through all layers of the quilt on the snowflakes.  

Next sew the rows together, pressing each seam allowance toward the setting square.  This helps to nest the seams together in the next step when you sen the rows together.

After sewing the rows together, I pressed these seams open as I think that helps things to lay flatter, and I'm making a table runner so I want it as flat as possible.


Then, add the long border strips to the sides, pressing the seams towards the border strips.
Finally, after adding the 4-1/2" green corner stone squares to the ends of the shorter border strips (again press those seams towards the border strip), sew these units to the ends of your table runner. 


To complete your table topper, layer with batting, and backing fabric and quilt.  I did a quick allover, swirly free motion design going around the snowflakes.  Bind using the red strips you cut for binding.


 Finally, add a few Holiday decorations, and...

Merry Christmas!

Thanks Dawn! 

Head over to Dawn's blog to find out how you can win a bundle of the Peace on Earth fabrics.  This contest is now closed.

See the entire Peace on Earth collection by Ro Gregg here.


Check out each day of our Home for the Holidays Hop!
Day 1: The Ho Ho Ho Pillow
Day 2: The Present Pillow
Day 3: Snowflake Pillow
Day 4: O Christmas Tree Pillow
Day 5: Peace on Earth Table Runner
Day 7: Let It Snow Applique Quilt
Day 8: Cinnamon Scented Coasters

Monday, December 14, 2015

Day 5: Home for the Holidays Blog Hop

Welcome to the fifth day of our Home for the Holidays blog hop! 
This week we'll be featuring a variety of small sewing projects to add holiday cheer to your house. These are fast and easy--you can still make them for this year, or bookmark the tutorial until after the holidays! We hope you enjoy these tutorials--and don't miss a chance to win a bundle of the fabrics featured each day!


Today Connie from Freemotion by the River is here sharing a patchwork table runner made using Ro Gregg's Peace on Earth collection. Two coordinates help the large focal print to shine, and a tonal outer border adds the perfect frame. 


Here's Connie!
I'm glad to be taking part in the Home for the Holidays Blog Hop!
Peace on Earth table runner tutorial by Connie Kresin Campbell


The beautiful Christmas collection I'm working with is called Peace on Earth by Ro Gregg. The dark green border I used is from the Leather collection. The size of the table runner is 19" x 43".


Peace on Earth fabric collection by Ro Gregg for Fabri-Quilt Inc.

Materials:

1/3 yard Christmas print
1/3 yard cream print
1/3 yard light green print
1/2 yard dark green
2/3 yard backing

Cutting:

Cream print:
cut one - 5 1/2" WOF (width of fabric) strip
     sub-cut - three - 5 1/2" x 5 1/2" squares
cut two - 2 1/4" WOF (width of fabric) strips
     sub-cut - 24 - 2 1/4" x 2 1/4" squares

Light green print:
 cut two - 2 1/4" WOF (width of fabric) strips
     sub-cut - 24 - 2 1/4" x 2 1/4" squares
cut three - 1 1/2" WOF (width of fabric) strips for first border
     sub-cut - 2 - 1 1/2" x 12 1/2" pieces
     sub-cut - 2 - 1 1/2" x 38 1/2" pieces

Christmas print:
cut two - 5 1/2" WOF (width of fabric) strips
     sub-cut 12 - 4" x 5 1/2" rectangles

Dark Green Border:
cut three - 3" - WOF (width of fabric) strips
     sub-cut 2 - 3" x 19 1/2" pieces
     sub-cut 2 - 3" x 38 1/2" pieces

Dark Green Binding:
cut three - 2 1/2" WOF (width of fabric) strips

Make the Table Runner:

Use a 1/4" seam allowance for the entire project and press to the darkest fabric.

Sew the 2 1/4" squares together as shown below. Make 12 groups.
Tutorial for piecing a christmas table runner

 Follow the diagram below to put your blocks together.
Tutorial and graphic for piecing a the blocks for the table runner

 Sew the rows together.
Tutorial for piecing the blocks for the table runner

 You will make three blocks for the table runner.  They are 12 1/2" square unfinished.
Finishing one 12 inch block for the table runner tutorial

Join the three blocks together.
Joining three blocks for the table runner tutorial

Add the first border. Sew the sides first and then the top and bottom.
adding the first border for the table runner tutorial

For the final border add the 3" x 38 1/2" pieces to the top and bottom. (this ensures your fabric will be wide enough for the border)

Then add the 3" x 19" pieces to the sides.
adding the final border for the table runner tutorial
Add your batting and backing and quilt as desired. Use the 2 1/2" strips of dark green for the binding.

Enjoy your new table runner for the holidays!
Peace on Earth table runner tutorial by Connie Kresin Campbell l Freemotion by the River

Thanks Connie!
Head over to Connie's blog to find out how you can win a bundle of Peace on Earth fabrics. 
This contest is now closed.

See the entire Peace on Earth collection by Ro Gregg here.


Check out each day of our Home for the Holidays Hop!
Day 1: The Ho Ho Ho Pillow
Day 2: The Present Pillow
Day 3: Snowflake Pillow
Day 4: O Christmas Tree Pillow
Day 6: Snowflake Table Topper
Day 7: Let It Snow Applique Quilt
Day 8: Cinnamon Scented Coasters

Friday, December 11, 2015

Day 4: Home for the Holidays Blog Hop

Welcome to the fourth day of our Home for the Holidays blog hop! 
This week, our focus will be on throw pillows--a fun and often overlooked way to add some holiday joy to your home! Next week we'll have a variety of small sewing decor projects, so be sure to stop by each day!

We think you'll enjoy the tutorials this week--including possibly new-to-you techniques. One of the great things about pillows is that by creating envelope-style or zipper pillows (we'll show you both methods), you can switch them out with your regular throw pillow covers for a quick and easy holiday decoration (and they don't require much storage space the rest of the year!).


Today's tutorial, the O Christmas Tree pillow, uses a variety of green prints from Season's Greetings, plus improv piecing techniques to create a modern-looking tree. Assemble the pillow top with reverse applique, and then quilt it and voila, your pillow is complete!


Materials

1/4 yard (or fat quarter) each of 4 green prints
1/2 yard of cream tree print
15" square of muslin
15" square fusible web
15" square fusible batting
12" zipper in coordinating color
Fabric marking pen
14" square pillow insert


Cutting
Green prints:

Cut a strip from each ranging in width from 2" to 4"

Cream tree print:
One 15" square and one 14-1/2" square

Make the Pillow
Download the tree template here.
Step 1: Fold the 15" muslin square in half and mark the center line. Cut out the half tree template, position it on the center line and trace. Flip template over and trace to complete the tree shape.

Note: Our muslin isn't quite 15" square--do as we say, not as we did! :)
Step 2: Trim two strips to slightly longer than width of tree shape bottom. Position one strip covering the bottom of the tree on a slight angle, right side up, and place a second strip on top, right side down. Pin and then stitch in place using a 1/4" seam allowance.

Step 3: Flip strip open and press. 

Step 4: Continue adding strips in the same manner. Angle the strips to created added interest. If your strips overlap a lot, fold the muslin foundation back and trim excess strip only (not foundation). You can also trim strip widths before adding to the tree. 


Step 5: Continue adding strips and pressing them open, trimming when needed. Strips only need to cover the tree outline, not the entire muslin square, so trim strip lengths as you work your way up. 
The finished pieced tree:

Step 6: Find the center of the 15" fusible web square and mark it. Trace the tree shape onto the fusible web. 

Step 7: Following manufacturer's directions, fuse to the wrong side of a 15" cream tree square. Cut out the tree shape, reserving the square with the negative shape and discarding the center tree shape. 

Step 8: Fuse the cream tree square onto the pieced green foundation piece. 

Step 9: Applique tree edges with a decorative stitch if you like. Fuse the 15" square of fusible web to the back of the pillow front. Quilt pillow front as desired (we used a 1" wide crosshatch). 

Step 10: Trim pillow top to measure 14-1/2" square. Use the remaining 14-1/2" cream tree square and 12" zipper to finish the pillow. Refer to the Present Pillow tutorial for steps. Stuff with pillow insert and enjoy!


For a chance to win a bundle of Season's Greetings prints, leave a comment letting us know that you follow the blog (if you don't already, sign up in the sidebar at right using the email or blog reader option). In your comment, also let us know: live tree or artificial? Giveaway is open through Friday, December 18th at 11:59 pm EST.

See the entire Season's Greetings collection here.

Check out each day of our Home for the Holidays Hop!
Day 1: The Ho Ho Ho Pillow
Day 2: The Present Pillow
Day 3: Snowflake Pillow
Day 5: Peace on Earth Table Runner
Day 6: Snowflake Table Topper
Day 7: Let It Snow Applique Quilt
Day 8: Cinnamon Scented Coasters


Thursday, December 10, 2015

Day 3: Home for the Holidays Blog Hop

Welcome to the third day of our Home for the Holidays blog hop! 
This week, our focus will be on throw pillows--a fun and often overlooked way to add some holiday joy to your home! Next week we'll have a variety of small sewing decor projects, so be sure to stop by each day!

We think you'll enjoy the tutorials this week--including possibly new-to-you techniques. One of the great things about pillows is that by creating envelope-style or zipper pillows (we'll show you both methods), you can switch them out with your regular throw pillow covers for a quick and easy holiday decoration (and they don't require much storage space the rest of the year!).


You can leave this Snowflake Pillow on the couch all winter long! The pillow uses a reverse applique technique--no worrying about the darker background fabric showing through the lighter snowflake fabric. We have a few different snowflake templates to choose from, including the one shown here. Imagine a couch full of snowflake pillows using the blue and white Season's Greetings prints--your own Winter Wonderland! This pillow measures 14" square.


Materials
1 fat quarter of blue snowflake plaid
1/2 yard of white snowflake print
14-1/2" square of fusible web
14" square pillow insert

Cutting
Blue snowflake plaid:
One 14-1/2" square

White snowflake print:
One 14-1/2" square
Two 10-1/2" x 14-1/2" pieces

We've created four different snowflake patterns that you can use. Our tutorial uses #2; you can see all four designs:
Download the pdf containing all four designs here; then print whichever you'd like to use.


Make the Pillow
Step 1: Tape the two pattern pages together along the dotted line as indicated. Mark the center line in both directions on the 14-1/2" square piece of fusible web. Layer the pattern under the fusing side of the fusible web, aligning the dotted lines with the drawn lines. Trace the snowflake half onto the paper side of the fusible web. Rotate the snowflake pattern and trace the other side as well.  


Step 2: Following manufacturer's directions, fuse the fusible web square to the wrong side of the 14-1/2" blue snowflake plaid square.
Step 3: Cut out the snowflake shape, leaving the negative space around the design as shown. 

Step 4: Fuse the blue snowflake outline to the 14-1/2" white snowflake square. Tip: Align the two squares and then quickly press down the points near the center just to get them in place. Then, working from the center out, press the directed amount of time with the iron to adhere the entire square. 

Step 5: Use a decorative stitch of choice to secure the applique edges (we used a zigzag stitch and silver thread).

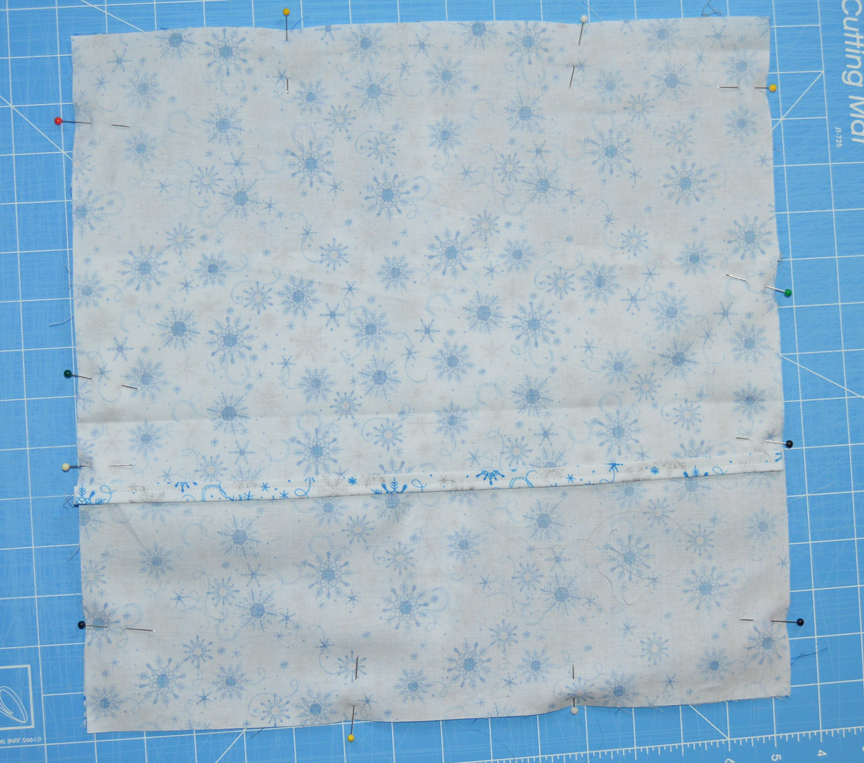
Step 6: On each of the 10-1/2" x 14-1/2" white snowflake pieces, fold one long edge over 1/4" wrong sides together and then fold over another 1/4". Topstitch to secure the hemmed edge. 

Step 7: Lay the pillow top right side up. Lay the two back pieces on top, right sides down, so the raw edges line up with the pillow top and the hemmed edges overlap in the center. Pin in place. 

Step 8: Sew around the outer edge of the pillow using a generous 1/4" seam allowance. Turn pillow right side out and stuff with a 14" square pillow insert. 


For a chance to win a bundle of Season's Greetings prints, leave a comment letting us know that you follow the blog (if you don't already, sign up in the sidebar at right using the email or blog reader option). In your comment, also let us know: do you still cut out paper snowflakes like you did when you were a child? Giveaway is open through Friday, December 18th at 11:59 pm EST. This contest is now closed.

See the entire Season's Greetings collection here.

Check out each day of our Home for the Holidays Hop!
Day 1: The Ho Ho Ho Pillow
Day 2: The Present Pillow
Day 4: O Christmas Tree Pillow
Day 5: Peace on Earth Table Runner
Day 6: Snowflake Table Topper
Day 7: Let It Snow Applique Quilt
Day 8: Cinnamon Scented Coasters