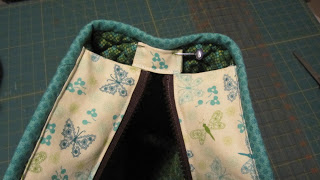
We're continuing our Tute-Happy Summer series today with Rebecca from Our Busy Little Bunch. She's sharing a tutorial for an overnight bag using pre-quilted Who's Who fabric--a great way to speed up a bag project by eliminating the quilting time! Enjoy Rebecca's tutorial and then head over to her blog for a chance to win materials to make your own bag!
Hi, I'm Rebecca from Our Busy Little Bunch and I'm excited to be sharing a free pattern with you today called The Overnight Bag. This pattern uses Fabri-Quilt's quilted fabric, which results in no need to make a separate lining or add interfacing to the main pieces, making it a quick and rewarding project. Fabri-Quilt carries a large selection of quilted cottons, with many prints to choose from.
First, you will need your supplies. The fabrics I used are from the Who's Who line by Ro Gregg.
-one yard quilted print for main pieces of bag and gusset
-one yard cotton for outer pocket and zipper strips
-one yard cotton for binding and straps
You will also need a 13" non-separating zipper (or larger one that you'll cut down later)
Let's start by making our main pattern piece with some scrap paper or freezer paper. Cut it 13" tall by 8" wide. Now you you need to make a mark 1.5" in from the top right edge, and cut from bottom corner to that mark. This pattern piece is for half of the bag and will be cut on the fold, so this will make the top of the bag 13" wide, and keep the bottom 16" wide. Next, round the bottom of the right side by using a curved ruler (or a plate from your kitchen works too, but make sure it's a gradual curve, not too sharp). Using your newly made pattern piece, cut two from quilted fabric on fold. If it's a directional print, make sure to decide best way to lay it out first and leave room for the gusset piece in next step.
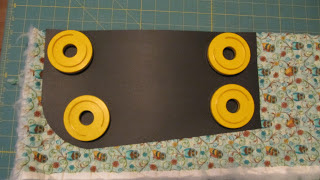
From the quilted fabric, cut one gusset piece 6" wide x width of fabric. Do a quick measurement with a measuring tape of distance around the sides and bottom of the main piece to ensure you cut it long enough, and add an extra inch for safe measure. Since your curve might be slightly sharper than mine, it might differ from my measurement (mine measured 39").
Next, take your pocket fabric and cut two outside front pockets. Do this by placing your pattern piece on the fold of the fabric, and measure 9" from bottom edge.
For the exterior back pocket, cut two pieces 6" x 9".
For the zipper pieces, cut two strips 13" x 5" and two tab pieces 3" square.
Now take your binding/strap fabric, and decide on the length you would like. You will either need to cut two or three strips width of fabric x 6". If going with a shorter length strap (42"), just leave the two strips separate. If going with a longer length, sew the three strips together, and then cut in half, giving you two straps 63" long (you can cut shorter if desired).
For bias binding, cut 2.5" strips measuring total length of 120". Also cut a smaller strip at 2" wide for tops of pockets, total length 21".
So you're ready to get sewing now! All seam allowances are 1/2" unless otherwise stated. First let's get those straps done. Press each strap in half, open up, and press raw edges to the center. You will end up with a strip pressed into quarters.
Sew close to each long edge, and then another seam down center.
Take one of your main exterior pieces, mark the center with a pin, and then pin the inside edge of straps 5" apart (2.5" from center). Place a pin across the top of the strap, 3" from the top of the bag.
Sew along the same seam lines on the edges of the straps, starting at the bottom of the bag, across the line where you marked with a pin, and back down the opposite side. DO NOT do this for the second main piece, just one.
Now take your front pocket pieces, and sew a strip of 2" binding between top edges (binding should be pressed in half, measuring 1" wide, and all four raw edges lined up together).
Open and press.
Place pocket piece on front of main piece, and sew 1/4" from the side and bottom edges to secure. Put aside for now.
Take the back pocket pieces and repeat steps above to sew the remaining piece of 2" strip to the top edges, open up and press.
Center the pocket piece along the bottom of the second main piece, and layer the strap on top with inside edges 5" apart. Sew along the long edges and across the pin (3" from top edge), same as you did for the other main piece. Set aside.
Now take your 2.5" wide pieces of binding, press in half, and sew two long strips to either side of the gusset piece, lining up raw edges, and secure with 1/4" seam allowance.
Pin and sew one main piece to the gusset piece, taking your time around the curves. Cut off excess.
Pin remaining main piece to the other side of gusset and sew.
Trim seam allowance to 1/4".
You now have the option of machine stitching or hand-stitching the binding down. I found it was a much nicer finish to hand-stitch, and I didn't even make it through one TV show before it was done.
Repeat with binding for top edge of bag - sew to top edge, trim seam allowance, hand stitch or machine-stitch in place.
Now take your zipper strips. Press all edges in 1/4", then press in half.
Pin to one edge of zipper starting beside zipper pull. Sew the three edges closed - along short ends and close to folded edge beside zipper. Repeat for other side.
Take your 3" squares and press all edges to center, and then press in half - creating a 1.5" x 0.75" strip. Enclose zipper ends in strips (cutting off excess zipper if needed), pin and stitch all around edges.
Center and pin one side of zipper piece just beneath binding on top of bag. Machine stitch close to edge.
Repeat for other side.
Center and pin end tabs to either side of bag and machine stitch.
And that's the final step - you're done! Enjoy your new bag! Perfect for an overnight bag or an all-day outing.