Showing posts with label Bella Casa. Show all posts

Friday, July 3, 2015

Happy 4th of July!


In honor of America's birthday, we're revisiting some of our favorite recent red, white and blue projects!


Barb Eikmeier's American Flag quilt, a bonus project that goes along with the Vintage Sampler BOM. 


"Freedom Squares" quilt by Jean Nolte; featured in Quilting Quickly Winter 2014 using the Tone on Tone snack pack
Find the Quilting Quickly issue or
purchase the individual digital pattern here


"Old Glory" by Pine Tree Country Quilts featuring the Tone on Tone snack pack
Find the free quilt pattern here

A free quilt pattern featuring a snack pack--the Bella Casa snack pack in the "Flags Forever" quilt by Airborne Heirlooms
Download the free quilt pattern here

Patriotic Pennants tutorial featuring the Tone on Tone collection
Find the tutorial here

Wishing you a safe and fun-filled July 4th weekend!

Thursday, October 30, 2014

Tour our booth!

If your Facebook feed for the last few days has been filled with mentions of Quilt Market* and so-and-so's booth, and you're wishing that you could have attended the show, we can help! We've just returned from Houston and we're ready to share!

Your tour today: A look at our Fall Quilt Market booth in Houston, as well as the fabric lines and quilts/projects showcased in it.

A view of one side of the booth:

And the other:

And now the close-ups!
Left: "Indigo Stars" quilt designed by Tammy Silvers of Tamarinis using Bella Casa (download the free pattern here)
Right: "Bella Rosa" quilt designed by Terry Albers of Hedgehog Quilts using Bella by Ro Gregg (pattern available for purchase on Hedgehog Quilts website)
On the table in front, left: "Circles and Squares" quilt designed by Airborne Heirlooms using Cosmopolitan (download the free pattern here)
On the table in front, right: "Fabulous Frames" quilt designed by Airborne Heirlooms using the Elemental Lines collection (download the free pattern here)


"A Walk in the Park" quilt designed by Pine Tree Country Quilts using Ro Gregg's A Walk in the Park collection (download the free pattern here)


"Mesmerize" quilt embroidery design by Jayme Crow of Bella Nona using Fabri-Quilt batiks and Magnifico threads by Superior Threads (quilted by Marlene Oddie of KISSed Quilts) 


"Flags Forever" quilt designed by Airborne Heirlooms using the Bella Casa snack pack (download the free quilt pattern here). 
(Notice the jersey displayed by this quilt--displaying some hometown baseball pride as our Kansas City Royals played in the World Series during Quilt Market!)


"Bella Garden Stroll" quilt by Mara Quilt Designs using Ro Gregg's Bella collection (download the free quilt pattern here)


"Romance in Flight" designed by Larene Smith of the Quilted Button using the Who's Who collection by Ro Gregg (Check our website soon to download this free pattern!) 


"Windsor Woods Block of the Month" quilt designed by Pine Tree Country Quilts using Ro Gregg's Windsor Woods collection (ask for it at your local quilt shop)


"Monkey Wrenches" quilt designed by Airborne Heirlooms using the Shadows snack pack (download the free quilt pattern here)


"Asian Fans" quilt designed by Terry Albers of Hedgehog Quilts using Ro Gregg's Asian Fanfare collection (download the free quilt pattern here)


"Stonewall" designed by Donna Lynn Thomas using Marblehead by Ro Gregg (pattern available for purchase on Donna Lynn Thomas' website)


 A booth sample quilt made by our own Sue Linam using our Cuddle Prints Flannel, chenille style!


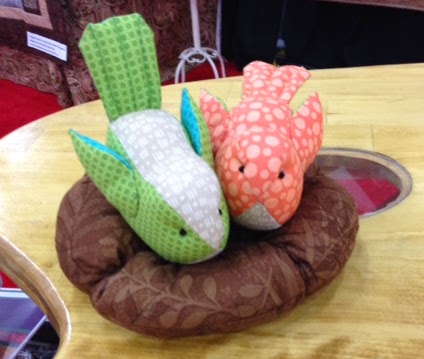
Birds in a nest! (Download the patterns here)


Meet our Magic Trees!
We wanted to create an organic, softly whimsical, magical garden feeling with these trees, so we had tiny birds and lights adorning the branches. We even had one nest with eggs in one of the trees. The idea continued through the booth with hanging birdhouses and stuffed birds in nests on the table (see below). The tree bases are wrapped with tubes covered in ruffles, and then we used ruffles on the thicker branches of the trees as well, and wrapped thinner branches with strips of fabric. 


And there's our booth! Thanks for coming along on the tour; keep an eye on the blog for more information about our new fabrics and patterns that debuted at Quilt Market!

*If you're wondering what Market is, twice a year Quilts Inc. holds industry-only shows for all things quilt related, and quilt shop owners see what's new and make purchases for their stores. The show floor is full of peeks at new fabric lines, quilting tools and machines, patterns, samples, and more...and don't forget a gallery section of show-stopping quilts on display!

Friday, August 1, 2014

Design Your Own Palette: Home Dec Prints

We had so much fun sharing the bright and summery mix and match prints the other day that we're back with more of the same, this time featuring some of our more home dec style prints, both those with a traditional and a contemporary feel. 

Let us know what you think of these!


Main print: Bella
Coordinating prints (clockwise, from upper left):


Main print: Elemental Lines

Coordinating prints (clockwise, from upper left):


 Main print: Windsor Woods
Coordinating prints (clockwise, from upper left):


See our mix and match bright palettes here.

Wednesday, July 30, 2014

Design Your Own Palette!

When you head to your local quilt shop, sometimes fabric shopping by collection is the way to go--the designer and fabric company worked hard to put together a well-rounded grouping of colors, different-sized motifs, and blenders--and you can't go wrong by taking their advice.

But sometimes, depending on the project, it's fun to mix and match fabrics, creating your own "collection." We've done just that today--selecting a focal print and then picking four coordinating prints that actually come from other fabric collections. We hope you enjoy our picks and use them as inspiration for your own!

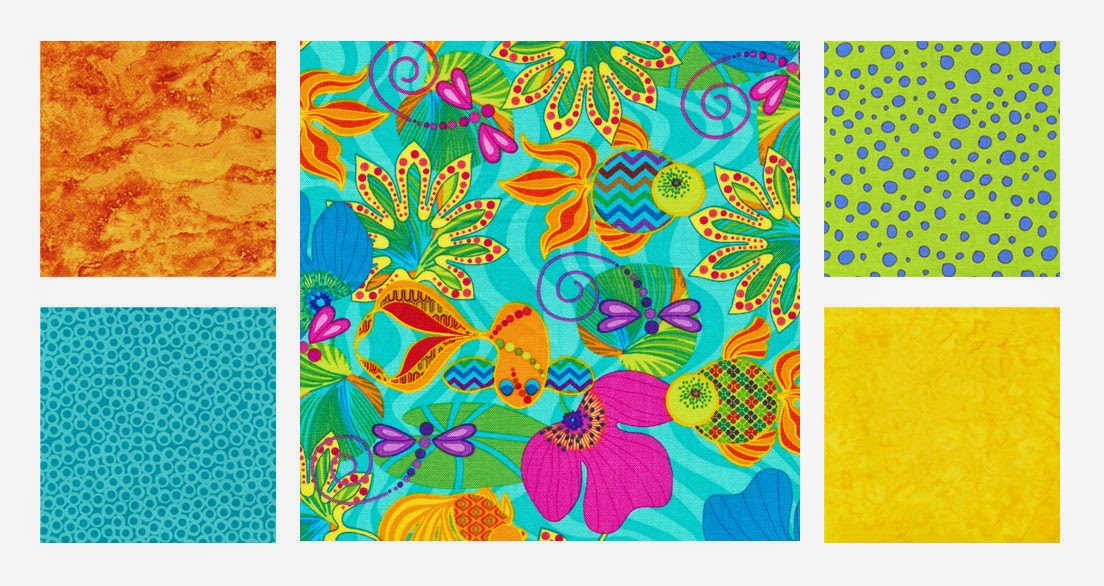
Main print: Calypso Goldfish
Coordinating prints (clockwise, from upper left):


Main print: Imagine This
Coordinating prints (clockwise, from upper left):


Main print: Bella Casa
Coordinating prints (clockwise, from upper left):


Main print: Tweet
Coordinating prints (clockwise, from upper left):

Which is your favorite?

Thursday, July 3, 2014

Saluting the Red, White and Blue (plus a free flag pattern!)

In honor of the 4th of July holiday, we're showcasing the red, white and blue! 

First up, download a free pattern for this classic flag quilt, made from 2-1/2" strips.


The "Old Glory" Snack Pack includes 42 strips--everything you need to make the quilt top and bind it--all tonals from our Tone on Tone collection.


Rich, textured hues from Marblehead and Marblehead Global Brights:


A fun red and blue swirl from Ro Gregg's Marblehead Venetian Glass:

Stars and swirls from Judy Hansen's new Nutcracker Christmas;


Contemporary coordinates from Linda Carlson and Diana Henage's Imagine This:


Juicy reds from Farmer John's Organic:


Modern designs from Ro Gregg's new Vibe collection:


And of course, the entire Bella Casa collection:


Look for this wide variety of red and blue prints at your local quilt shop! 
Have a safe and happy 4th of July!


Tuesday, July 1, 2014

Bella Casa Winner!

Thanks to all who commented on our summer tote tutorial last week. Our winner is:


Congrats, Julie! Please email us at fabriquiltblog (at) gmail.com with your last name and mailing address so we can send you a fat quarter bundle of Bella Casa.

Thursday, June 26, 2014

Summer Tote Tutorial!

Welcome to summer! We're celebrating this glorious, sunny season with the Bella Casa Summer Tote tutorial, made with none other than the Bella Casa fabric collection. We hope you enjoy the tutorial! Don't forget to leave a comment for a chance to win some Bella Casa prints for yourself (see details at the bottom of the post).


The tote has exposed boxed out corners just for fun--cover the tips with a button if you like!

These fresh red and blue fabrics really put you in the mood for berry picking--strawberries and blueberries! We used the chevron for the main print on the tote, though the circle print would be equally fun. Two great prints--one for the outer bag, and one for the lining!

Materials:
2/3 yard red chevron print
1 yard blue tonal print
2/3 yard blue/white circle print
1/3 yard red tonal print
Pellon Decor Bond
Pellon 987F Fusible Fleece

Cutting:
Red chevron:
Two 18" x 21" pieces for outer bag

Blue tonal:
Three 8" x 42" strips for handles
Two 10-1/2" x 21" pieces for outer bag bottom

Blue/white circle:
Two 20" x 21" pieces for lining

Red tonal:
One 10-1/2" x 21" piece for inner pocket

Decor Bond:
Two 18" x 21" pieces

Fusible Fleece:
Two 20" x 21" pieces
Three 2" x 36" strips

Step 1 Cut one 8" x 42" blue tonal strip in half. Sew each half strip to the short end of a full strip. Press each strip in half lengthwise, wrong sides together. Unfold and fold each long raw edge to the center fold line. Position a 2" wide strip of fusible fleece on the blue strip as shown, and then half of a second fusible fleece strip (Note: This makes a handle approximately 54" long. The straps on this bag each measure 44-1/2" long. You can adjust the length as desired, adding more fusible fleece to fill out the length of the blue fabric handle pieces if you like.) Following manufacturer's instructions, press to fuse in place. Repeat for second handle.

Step 2 Fold the fabric in to create a handle approximately 2" wide, with raw edges sandwiched inside. Topstitch 1/4" from both long edges and then again two to three times in the handle center as you like. 

Step 3 Following manufacturer's directions, fuse each 18" x 21" Decor Bond piece to the wrong side of an 18" x 21" red chevron piece. Measure 10-1/2" up from the bottom edge of the chevron piece and mark a horizontal line. Position one handle so the ends extend 1/2" below the marked line and pin in place, 5" in from the left and right sides of chevron piece. Test handle over your shoulder to decide on length. (Ours measured 44-1/2", but you may prefer yours longer or shorter.)


Step 4 Position the 10-1/2" x 21" blue piece right sides together on the top of the chevron piece, aligning the bottom edge of the blue with the marked line. (See how the handle ends peek out?). Stitch along the bottom edge of the blue using a 1/4" seam allowance. Flip blue down, press, and topstitch 1/4" from where the blue meets the red chevron in the middle of the bag. Trim blue piece at bag bottom to align with red chevron piece if needed. Repeat handle and blue fabric addition on second red chevron outer bag piece. 

Step 5 Stitch a box and X on the handle to secure it to the outer bag chevron piece approximately 2-1/2" from the top edge. Repeat on all four handle pieces.

Step 6  Position the two outer bag pieces right sides together and sew along sides and bottom. Turn right side out.
Step 7 Manipulate bag so a side seam and bottom seam are aligned, creating a pointed corner as shown.  Measure 3" in from the corner and draw a horizontal line. 

Step 8 Fold the corner up on the marked line (line will be inside what you see here) and pin tip in place. 

Step 9 Stitch across the tip to secure, making sure that you are not sewing through all layers of the bag--just the tip and the side of the bag the tip is pinned to. Stitch back and forth a few times to secure. Repeat on opposite side. Note: If you're prefer a more traditional hidden corner, turn the bag right side out, skip steps 7-9, and follow Steps 14 and 15 that explain how to box the lining corner.

Step 10 Fold the 10-1/2" x 21" red tonal piece in half wrong sides together to measure 10-1/2" square. Sew around 3 sides, leaving an opening for turning. Turn right side out and press, including pressing the raw edges in on the opening. Topstitch along the folded edge for the pocket top.

Step 11 Following manufacturer's instructions, fuse each 20" x 21" fusible fleece piece to the wrong side of a 20" x 21" blue/white circles piece. 
Step 12 Position the pocket (topstitched edge up) on one 21" x 20" blue/white circle piece (21" dimension should be the width; 20" the height). Center pocket from left to right and pin 6" up fro bottom edge. Topstitch along sides and bottom to secure (this also closes the opening in the pocket).

Step 13 Layer lining pieces right sides together and stitch along sides and bottom using a 1/4" seam allowance. Leave an opening for turning along the bottom. 

Step 14 Cut 2-1/2" squares out of both bottom corners. 

Step 15 Fold lining so side and bottom seams align, matching raw edges, and stitch along raw edges to box the corner. Repeat on opposite corner. 

Step 16 Slide the outer bag (right side out) inside the lining (still wrong side out) and pin along the top edge, matching raw edges and side seams. Make sure handles are tucked inside! Stitch around the top edge of the bag to secure.

Step 17 Turn bag right side out through opening in lining. Handstitch opening closed. Tuck lining inside the bag. 
Step 18 The lining is taller than the bag, creating a strip of lining that peeks out of the bag top. Align outer bag and lining bottoms to determine how much lining will be exposed at top. Pin in place and topstitch on outer bag just below the lining edge.

A peek into the inside of the bag:

This bag looks and feels like summer!

Perfect for beach or lake house trips, or just for errands around town.

How would you like some of the Bella Casa prints to play with? Simply leave a comment sharing your favorite summer activity for a chance to win a fat quarter bundle of Bella Casa. This giveaway is open through Monday, June 30 at 11:59 pm EST. We'll randomly draw a winner on Tuesday.