Showing posts with label embroidery. Show all posts

Friday, March 9, 2018

A little 30s inspired weekend inspiration

Last fall we shared blocks from Barbara Eikmeier's 30's Sampler Block of the Month featuring the Vintage 30's Ruby's Treasures collection. We have more to show off today, including some of the adorable applique blocks made from the collections embroidery panels. 

The quilt features 81 blocks: 41 pieced blocks and 40 appliqued blocks. 
Barb used a back basting applique method to create the shapes for each block and made the entire quilt from a fat quarter bundle of the Vintage 30's prints plus the coordinating solids.


The pink barn with a fun striped silo:


Delicate florals:


What a neat windmill variation:


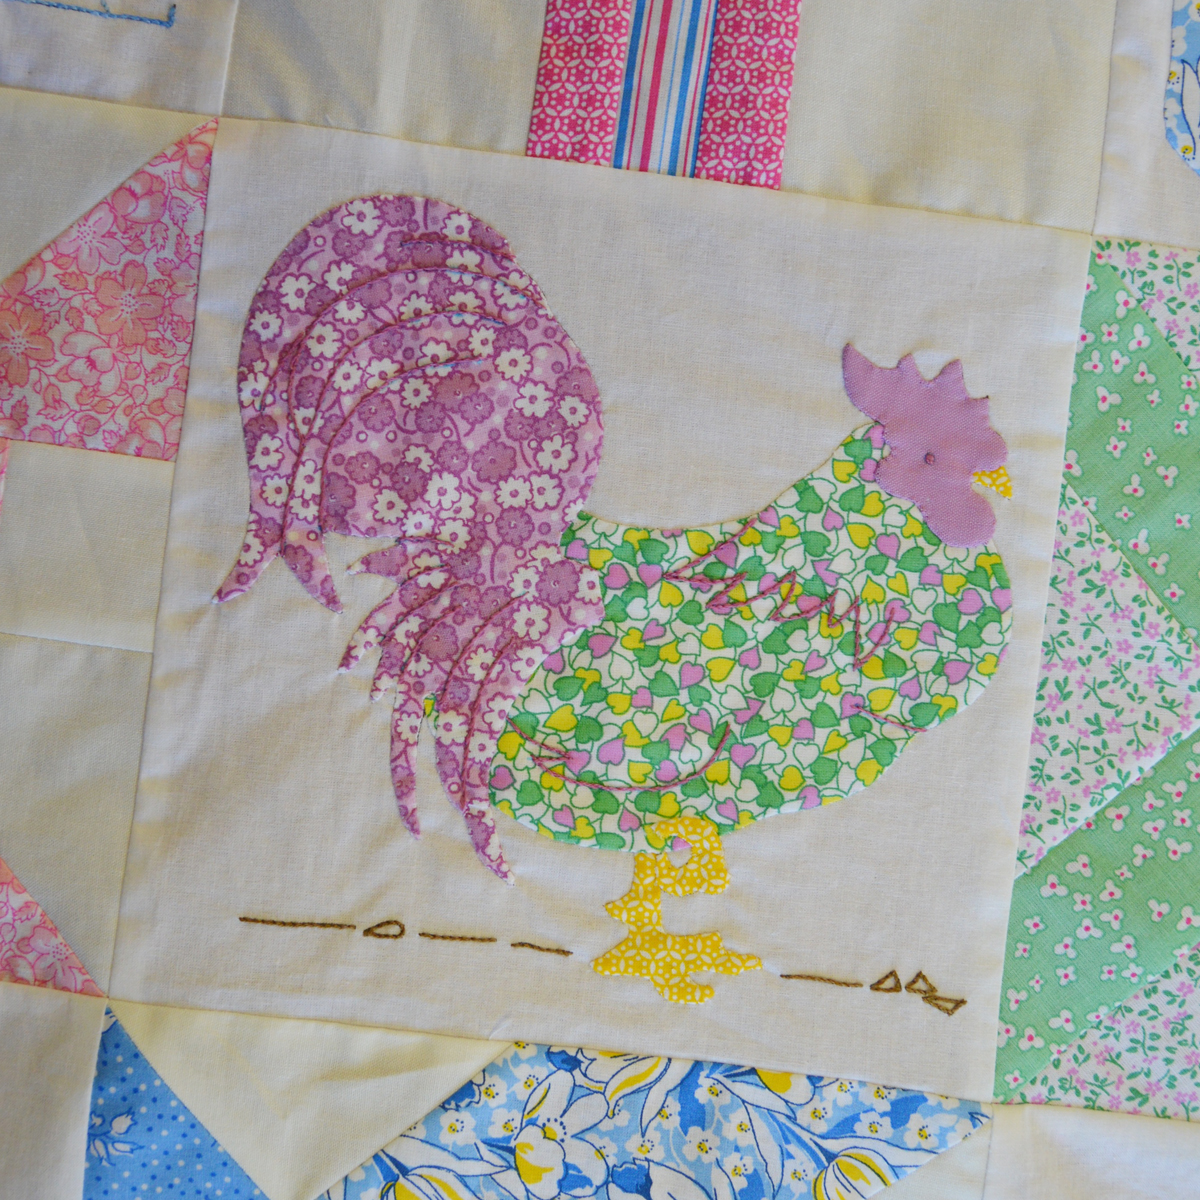
Love the green and purple rooster!


The pieced blocks in the BOM include plenty of unique designs such as this one: 


So much detail in this fishing block:


This pig might be our favorite, peeking over the striped fence.


We can't wait to see this quilted!


Read more about the BOM here. 
It's not too late to sew along! Barb's quilt is almost done, but you can purchase the patterns and the kit on her website.

Thursday, August 3, 2017

Summer of Sewing: Farm Animals Soft Book

During our Summer of Sewing series, we'll be featuring weekly tutorials using our new fabric collections (and giveaways, too!). Join us each week, sit back, relax, and then start sewing! 


This week's tutorial comes from Barb Eikmeier, designer of the Vintage Shirtings & Dress Prints, Vintage 30s Ruby's Treasures, and Waddington Road collections. You've seen several projects here on the blog (including a blog hop!) featuring the Vintage 30s Ruby's Treasures collection, but today Barb is here to show you how to make an adorable soft book for a child out of the Farm Life embroidery panel.


Now it's Barb's turn:
If you're looking for a different way to use Ruby's Farm Life Treasures pre-printed embroidery blocks, consider sewing them into a book for a special child. I made this version for my granddaughter when she was learning farm animal sounds. Framing the blocks with a pretty scalloped border not only enlarged the blocks but also gave me an opportunity to showcase the VVintage 30s Ruby's Treasures fabric collection.

Let's get started!
You'll Need:
(15) Ruby's Farm Life Treasures pre-printed blocks with the embroidery stitching completed
(14) 11" squares of a variety of Vintage 30s Ruby's Treasures prints 
(4) 11" x 22" pieces of lightweight fusible fleece
(1) 11" x 21-1/2" Vintage 30s Ruby's Treasures print for the front cover
(1) Elastic pony tail band for fastener (optional)
(1) 5/8" button (optional)
EZ Quilting Wavy Square template

Step 1: On the wrong side of the completed embroidery block trace the curvy shape. We used the 8" Wavy Square template but you could also freehand draw a curvy frame. 

Step 2: Place an 11" square of print fabric right side down on work surface, and position the prepared embroidered block right side down on top of it. Machine baste on the drawn line. 

Step 3: From the right side trim away the inside of the curvy shape leaving a 1/8" seam allowance. Remove the basting a few inches at a time and needle turn the seam allowance - the basting stitches will leave a perforated line, marking the turn line. Hand applique in place. Trim to 10" square. Repeat for 12 blocks. Trim the remaining two blocks to 11" square (they will go on the inside of the cover).


Step 4: To make the cover, crease the 11 x 21-1/2" piece of fabric in half, marking the center of the long edge. Repeat Step 3 centering the embroidered design you've selected for the cover on the right side of the long piece. The back or left side will be blank (no embroidery block). 

Step 5: Sew the blocks right sides together into pairs. Press the seam open. Trim the cover to the same size as a two-page spread with the 11" square blocks. Place the remaining two-page spreads right sides together in pairs. Press fusible fleece to the wrong side of a two-page spread. Stitch all the way around leaving an opening for turning. Trim the excess fleece and trim the corners at an angle. Turn right side out and hand stitch the opening closed. Press. Top stitch all the way around to complete the two-page spread. Repeat for the remaining pages and the cover (insert one end of the pony tail holder on the blank end of the cover if you'd like a closure; you'll add the button in step 7). Here a few examples of completed two page spreads.


Step 6: Arrange the paired pages in the order you'd like, making sure the cover is right side down on the bottom of the pile. Pin all the pages together along the center seams. Stitch through all layers, sewing along the center seam.

 Step 7: Sew a button on the front edge of the cover, centered from top to bottom.


  Step 8: Use a scrap of fabric to add a handle (if you'd like). 


 Enjoy the Farm Animals soft book!


Would you like to win a bundle of Vintage 30s Ruby's Treasures fabrics? Leave a comment below (or on IG) telling us whether your favorite farm animal. Giveaway is open through Sunday, August 6th at 11:59 PM CDT. 


Follow along with our Summer of Sewing Series! 
Click here to see all the tutorials.

Walkabout 2 bundle winner:
Meloney

Wednesday, August 17, 2016

Summer of Sewing: Embroidered Drawstring Bag

Welcome back to our Summer of Sewing tutorials here at Inspired by Fabric! 

We'll be featuring regular tutorials as part of our Summer of Sewing series, all using our newest fabric lines that you can find at your local quilt shop! Our tutorials will include a chance to win a bundle of the fabric line being used, so make sure to enter each time!


Today's tutorial once again uses Barbara J. Eikmeier's Vintage 30's Ruby's Treasures collection and is once again a drawstring bag (see our previous patchwork drawstring bag tutorial here). But...it's totally different! We've embroidered a flower block from the collection's Flower Garden panel and used it as the centerpiece for a sweet (and slightly smaller) drawstring bag. We've also shared a different casing technique for creating the bag closure itself. And, if as you read this, you're thinking that hand embroidery is not for you, we urge you to give it a try! Much like hand stitching a binding to a quilt, it's a relaxing and satisfying activity, and the results are gorgeous! 

By the way, did you know that Barb has a collection of Aurifloss (that would be embroidery floss from Aurifil!) that coordinates with the Vintage 30's Ruby's Treasures fabric line? Find it here!

Let's get started!

You'll Need:
1 Flower Garden panel
5 Vintage 30's fat quarters (one for the backing; from the remainder you'll just need a strip each--we used two blue print and three pink print)
1/2 yard solid white for lining
1/4 yard solid blue for drawstrings
12" square of muslin
Coordinating embroidery floss and needle
Embroidery hoop

Cutting:
From each of two blue print fat quarters:
(1) 2-1/2" x 8" strip

From one pink print fat quarter:
(1) 2-1/2" x 12" strip

From a second pink print fat quarter:
(1) 5" x 12" strip

From the last pink print fat quarter:
(1) 12" x 14-1/2" piece (for backing)

From the solid white: 
(2) 12" x 14-1/2" pieces

From the solid blue: 
(2) 2" x 42" strips

From the panel:
Choose one embroidery design and cut out a 12" square (this leaves room for the hoop)

Make the Bag:
1. Layer the embroidery square with the muslin square and secure in your hoop, centering the design. 

2. Using coordinating embroidery floss and your stitches of choice, embroider the flower design. 

3. Remove the embroidery from the hoop and trim to measure 8" square, centering the design. 

 4. Sew the (2) 2-1/2" x 8" blue print strips to the sides of the embroidery square. Sew the 2-1/2" x 12" pink print strip to the bottom edge and the 5" x 12" pink print strip to the top edge.

5. Sew the bag front to the 12" x 14-1/2" pink print bag back along the bottom short edge. Sew (1) 12" x 14-1/2" solid white piece to the opposite short edge of both the bag front and back as shown. 

6. Fold the pieced strip in half right sides together along the seam between the bag back and front, aligning the edges. The raw edges of the two lining pieces should match up as well. Pin edges to secure. Using a fabric marking pen, measure 2" from the top edge of the embroidered square and mark a line as shown. Measure and mark a second line 1" from the first line.

7. Stitch around the three open sides, leaving a 4" opening for turning on the short edge of the lining pieces. DO NOT stitch between the marked lines on either side of the bag front. Backstitch as you approach the line to secure, skip over that 1", and then backstitch as you start again. 

8. Turn the bag right side out through the lining opening. Stitch the lining opening shut. Tuck the lining into the bag and press the top seam. Poke bottom corners out as needed. 

9. Using the existing marked lines on the bag front (re-measure and redraw if you can't see them--ours bled through the fabric enough that we could see them), continue the lines onto the back side of the bag as well. Stitch on each of these marked lines, being careful to only stitch through one side of the bag at a time. (It will be as if you are stitching a tube--you'll be stitching through the bag front and lining sandwiched together, and rotating as you sew, until you're stitching through the bag back and second lining piece.) This creates the casing for the drawstrings. If you stitch through all layers at once, your bag won't open!

10. Press each 2" x 42" strip in half lengthwise. Open and press both long edges in to the center fold.

11. Refold on the center fold line and topstitch along the entire strip to create the drawstring. Make two.

12. Using a safety pin, feed one drawstring into the casing from the left side. Feed through the bag front and bag back, exiting on the left side. Tie the ends together in a knot. Feed the second strip into the casing from the right side. Feed through the bag front and back, exiting on the right side. Tie the ends together in a knot. 


The finished bag!

For a chance to win a FQ bundle of Vintage 30's Ruby's Treasures AND a box of the coordinating Aurifloss, make sure you follow our blog! Leave a comment below letting us know that you do, as well as telling us if you've ever done any hand embroidery. The giveaway is open through Sunday, August 21st at 11:59 pm EST. We'll draw a winner and share it next week. 

Congratulations to the winner from last week's Sophisticates bundle: Kira