Showing posts with label star sampler blog hop. Show all posts

Wednesday, March 19, 2014

Star Sampler Winners!

Thanks so much to everyone who left comments during the nine days of our Star Sampler Blog Hop! We hope you all enjoyed the tutorials and the fantastic star blocks made using Marblehead Venetian Glass as much as we did! 


We've selected 3 winners from the comments to receive their own bundles of Marblehead Venetian Glass. We added all the comments from the blog hop (531 total), used random number generator to pick 3 comment numbers, and then found those commenters chronologically, starting from the comments on day 1. 

Our winners are:


Congratulations, winners! Please email us at fabriquiltblog (at) gmail.com with your mailing address. Once we have all three addresses, we'll send out the bundles. 


Here are the links for the nine tutorials in case you missed any!


     Star #1: Connie of Free Motion by the River
     Star #2: Joanne
     Star #3: Fabri-Quilt blog team
     Star #4: Dawn from Spring Water Designs
     Star #5: Heidi from The Whimsical Workshop
     Star #6: Fabri-Quilt blog team
     Star #7: Shanna from Fiber of All Sorts
     Star #8: Tammy from Tamarinis
     Star #9: Monica from Diary of a Quilt Maven

Friday, March 14, 2014

Star Sampler Block #9

It's the last day of our Star Sampler blog hop! We hope you've enjoyed following along as much as we've enjoyed sharing these blocks. Today Monica from Diary of a Quilt Maven is sharing her block. Head over to her blog to see the tutorial, and then come back here to enter the giveaway to win a bundle of these gorgeous prints.
This sampler series of nine star blocks began last week and concludes today. The star blocks are made using Ro Gregg's Marblehead Venetian Glass fabrics. If you missed blocks #1-8, you'll find links for them at the bottom of this post.


Here's Monica's star block:

Looks like a lot of piecing, but it's all made of simple components: squares, half-square triangle units, flying geese units, and quick corners. Piece of cake, all done in warm-weather-inspired greens and blues. Find the tutorial here.

Thanks Monica!

      For a chance to win one of 3 fat quarter bundles of Marblehead Venetian Glass, sign up to follow Inspired by Fabric (using the "follow" button or the "follow by email" button in the right hand side bar) and leave an email letting us know you did, as well as telling us--which block is your favorite in this sampler? You can leave a comment to enter once for each post during the Star Sampler hop (9 entries total). The giveaway will be open through Monday, March 17th at 11:59 EST, and we'll randomly pick 3 winners on Wednesday of that week. 

     Make sure you catch the tutorials for all the blocks in the sampler!
     Star #1: Connie of Free Motion by the River
     Star #2: Joanne
     Star #3: Fabri-Quilt blog team
     Star #4: Dawn from Spring Water Designs
     Star #5: Heidi from The Whimsical Workshop 
     Star #6: Fabri-Quilt blog team

     Star #7: Shanna from Fiber of All Sorts
     Star #8: Tammy from Tamarinis
     

Thursday, March 13, 2014

Star Sampler Block #8


We're back with the second-last star tutorial for our Star Sampler, created by Tammy of Tamarinis. This star shines on a dark blue background! Tammy calls it the "woven ribbon" star, and you'll see how some careful cutting creates "ribbons" that really do seem to weave in and out of the star.


This sampler series of nine star blocks began last week and concludes tomorrow. The star blocks are made using Ro Gregg's Marblehead Venetian Glass fabrics. If you missed blocks #1-7, you'll find links for them at the bottom of this post. Plus, don't miss the chance to enter a giveaway to win a bundle of these gorgeous prints! 


Tammy: I was thrilled to be asked to participate in Fabri-Quilt’s Star Block promotion.  Ro Gregg’s Venetian Glass line is truly spectacular, and any excuse to play with those luscious fabrics is a good excuse, right?

Here’s my block – a woven ribbon star:


Now, before I begin – a funny (short) story.  I was trying to hurry – and we all know what a BAD idea that usually is.  Yep – no different for me.  I pulled up the wrong rendering – and made the wrong block.  Urgh!  I’ll share that one at the end – just so you can see what a different color placement can make!

To begin:

I started with these four beauties – fat quarters of navy with gold, paisley print, mottled blue, and cream with gold.  Strips are cut along the 22” side of the fat quarter.


Cutting:

Navy: (1) 3 ¾” strip
            (1) 4 ½” strip; subcut (4) 4 ½” squares

Paisley: (2) 1 7/8” strips
                        Cut (2) 1 7/8” x 3 3/8” rectangles from one strip

Mottled: (1) 1 7/8” strip
                        Cut (2) 1 7/8” x 3 3/8” rectangles from strip
                (1) 2” strip

Cream: (1) 3 ¾” strip
                        Cut (1) 3 3/8” square from strip
             (1) 2 ½” strip
             (1) 2” strip
             (1) 1 7/8” strip; subcut (4) 1 7/8” squares


Sew the Paisley 1 7/8” x 3 3/8” rectangles to the left and right sides of the 3 3/8” Cream square.  Press to the Paisley rectangles.


Sew the Cream 1 7/8” squares to the left and right side of the Mottled 1 7/8” x 3 3/8” rectangle.  Press to the Mottled rectangle. Repeat to make (2) sets. 

Sew to the top and bottom of the Paisley/Cream unit created above.


Create a strip set by sewing the Cream 2 ½” strip to the Paisley 1 7/8” strip.  Press to the Paisley.  Sew the Navy 3 ¾” strip to the Paisley strip.  Press to the Paisley.


Using your 6 ½” square, place the 45 degree line on the seam line between the Paisley and the Navy strip. 


Cut along the right side, cutting along the navy up to the paisley, then making the second side cut along the Paisley/Cream side.  Now turn that around and square it up, cutting a 4 7/8” square.  It will look like this.


Cut this square in half once, corner to corner.

                        
Repeat with remainder of strip set to create (2) additional HSTs (half square triangles).  Set aside – we’ll come back to these, plus the center block, in just a moment.

Sew the 2” Cream strip to the 2” Mottled strip.  Press to the Mottled strip.

Cut (4) 3 ½” squares from the strip set.  You will be cutting these in half – but not corner to corner (gesh – that would be TOO easy, huh?).  Measure ¼” down from the top corner, ¼” in from the bottom corner, and cut along that line.  Using the picture as a guide, cut (2) squares in half from top left to bottom right, (2) from top right to bottom left.


It sounds odd – but it works.  (And I know because I had to do this twice – to get it right!).  You’ll be using the larger (non-pointed) HST units in your star block construction.

Ready to start putting all these pieces together?  You should have all the pieces as shown:


The Cream/Mottled HSTs  will be paired up with (2) of the 4 ½” Navy squares.


Note the Cream portions meet at the corner.


Fold the Navy square in half, right sides together, to mark the center point.  Fold the Mottled/Cream HST in half along the long side, wrong sides together, to mark the center point.  Match up these finger creases, and sew the first HST to the marked side of the Navy 4 ½” square.  Press to the Navy square.               


Repeat with the second Mottled/Cream HST to complete one corner, pressing to the HST.  Repeat to make the second corner unit.

Remaining (2) corner blocks:
Note that again the cream corners meet at the center.


Lining up the corner, flip one HST unit onto the Navy 4 ½” square and stitch along the strip set side (the side with the two seams).  Press to the Navy square.


Now repeat with the second HST unit, ensure that placement is correct (cream points are meeting in the middle).  Press to the HST.


Repeat with the remaining corner.

Now you should have all sections to create your star.  The block is stitched together on the diagonal.  Lay your sections out in three rows as shown:


Begin by stitching the Mottled corner units to the Paisley sides of the center unit.  Press to the center unit.


Final step (woohoo!) – matching up seam lines, sew the last (2) corner units to the center block unit.  Press away from the center.

And you are done!


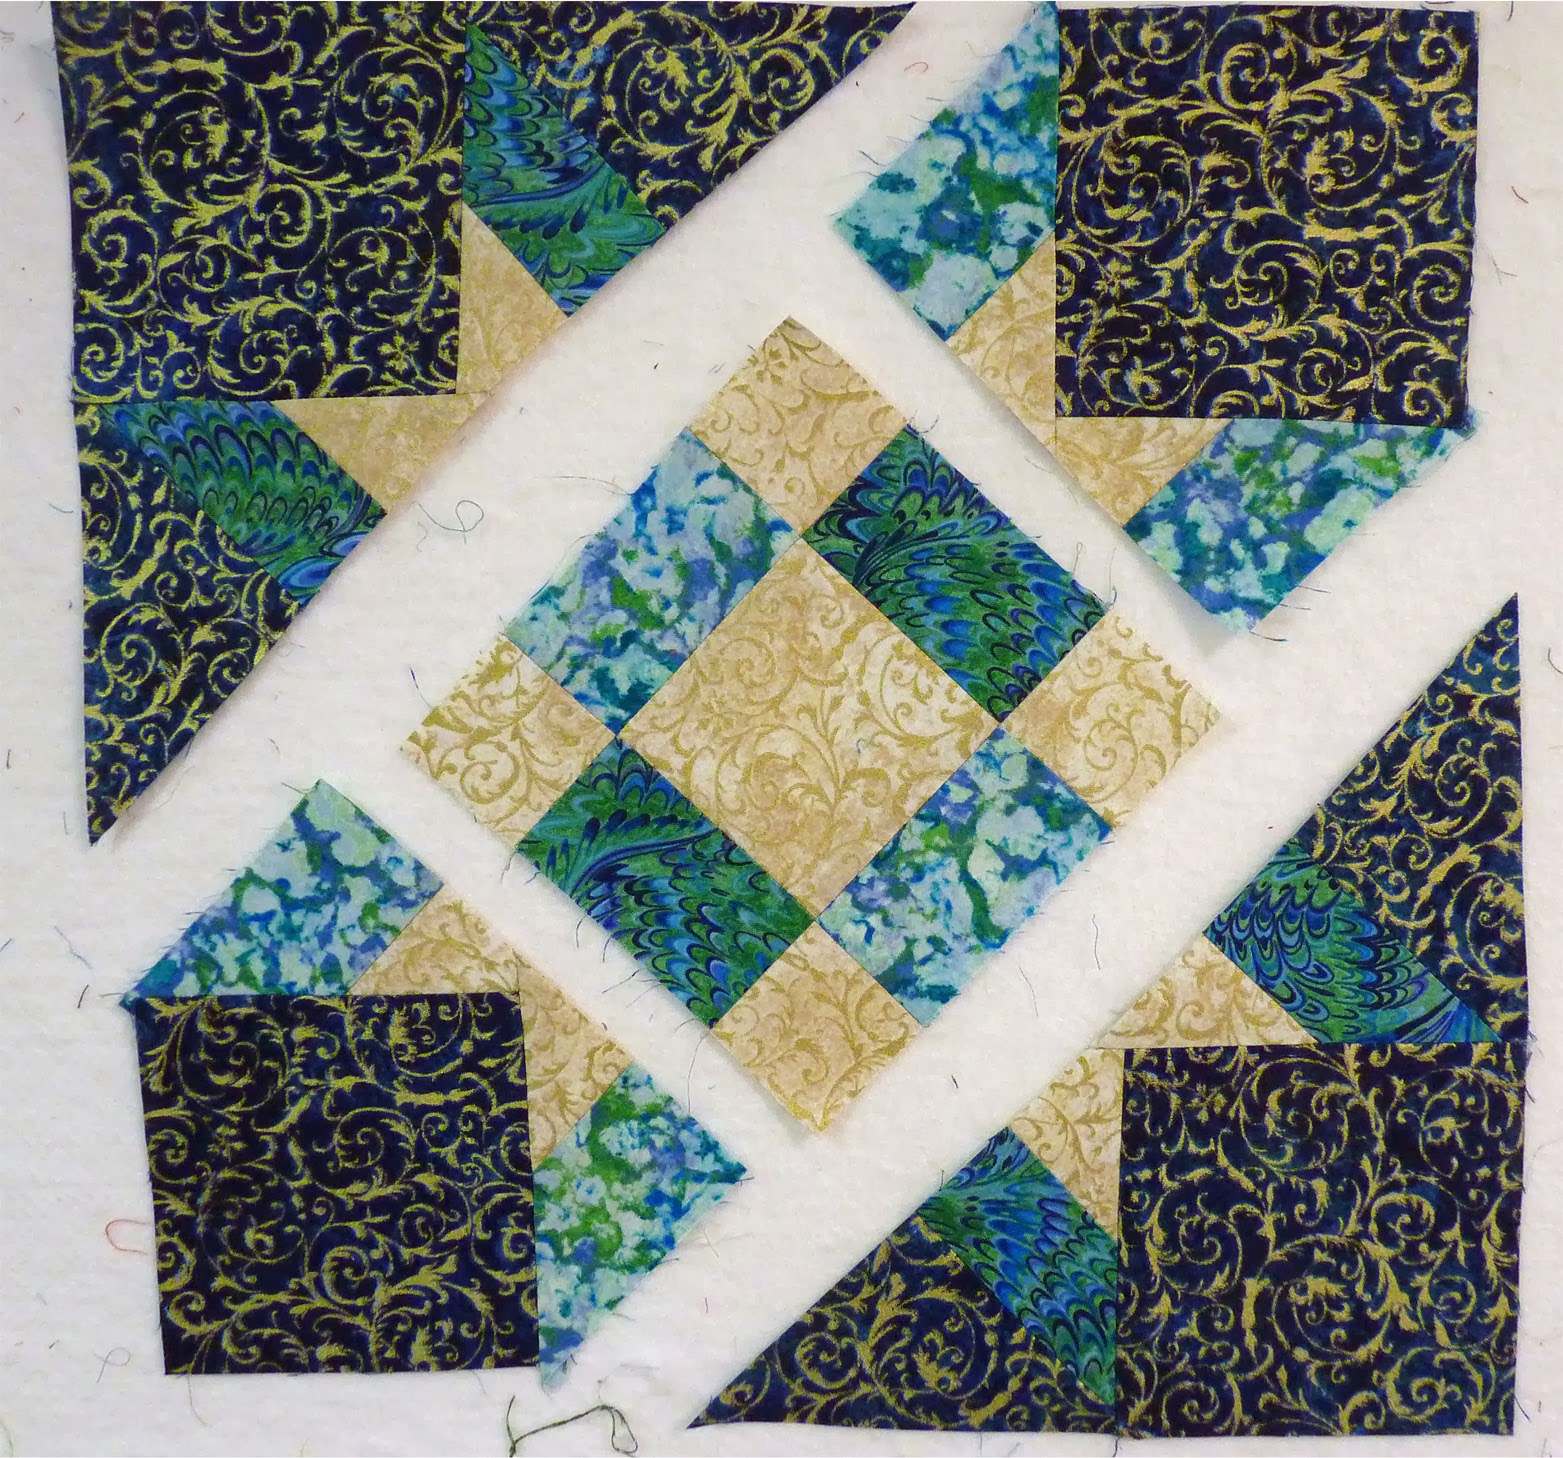
And what about that “oops” block, you ask?  Well, here you go.  See what a difference color placement makes?  I forgot about the Navy background when piecing the HSTs, and suddenly the star point is lost.  Oops!!!


Happy Stitching!

Tammy

      For a chance to win one of 3 fat quarter bundles of Marblehead Venetian Glass, sign up to follow Inspired by Fabric (using the "follow" button or the "follow by email" button in the right hand side bar) and leave an email letting us know you did, as well as telling us--what size quilt do you make most (lap, bed, wall hanging, table runners, etc.)? You can leave a comment to enter once for each post during the Star Sampler hop (9 entries total). The giveaway will be open through Monday, March 17th at 11:59 EST, and we'll randomly pick 3 winners on Wednesday of that week. 

     Make sure you catch the tutorials for all the blocks in the sampler!
     Star #1: Connie of Free Motion by the River
     Star #2: Joanne
     Star #3: Fabri-Quilt blog team
     Star #4: Dawn from Spring Water Designs
     Star #5: Heidi from The Whimsical Workshop 
     Star #6: Fabri-Quilt blog team
     Star #7: Shanna from Fiber of All Sorts
     Star #9: Monica from Diary of a Quilt Maven


Wednesday, March 12, 2014

Star Sampler Block #7


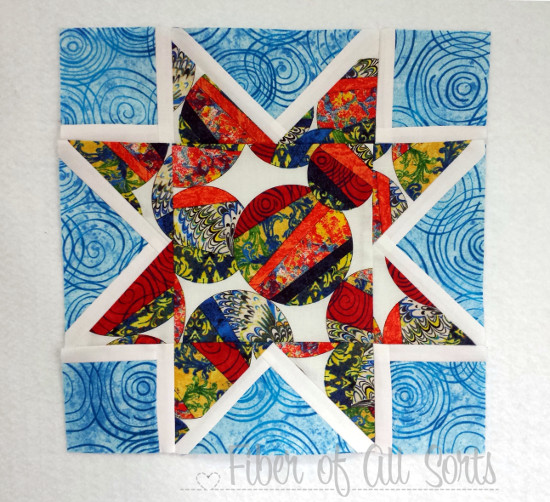
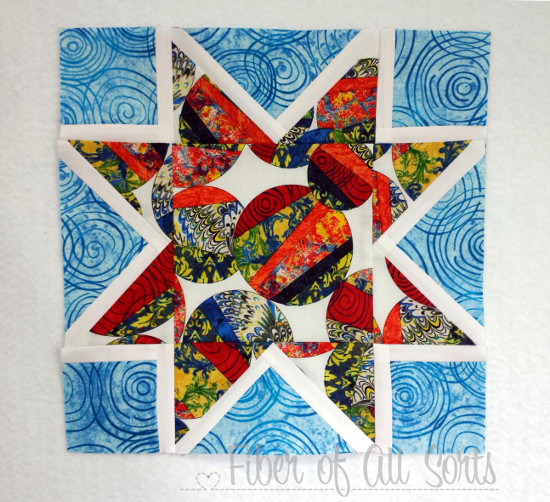
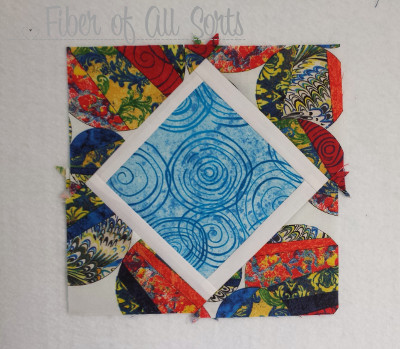
We're back with star block #7, created by Shanna from Fiber of All Sorts. She used solid white to create a narrow border around her star--such a cool look! And with her make-larger-and-trim-down approach,  this block is easier to make than you'd think! Just be aware that the outer edges of the star points may stretch slightly.

This sampler series of nine star blocks began last week and will run all of this week as well. The star blocks are made using Ro Gregg's Marblehead Venetian Glass fabrics. If you missed blocks #1-6, you'll find links for them at the bottom of this post. Plus, don't miss the chance to enter a giveaway to win a bundle of these gorgeous prints! 


Shanna: This whole quilting experience keeps changing my mind on what I like to make.  I’m on a flying goose kick lately and this block came easily to mind. Of course how to change things up is always fun!
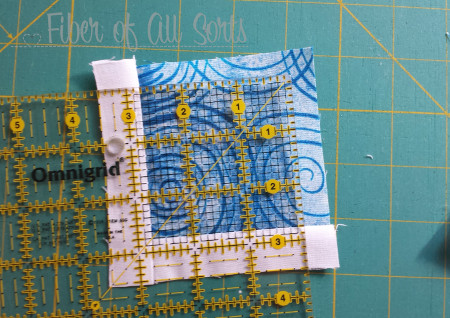
As a warning these block pieces are made larger pieces and then trimmed down to size. I have been using this methodology as the blocks have turned out so much easier to piece.
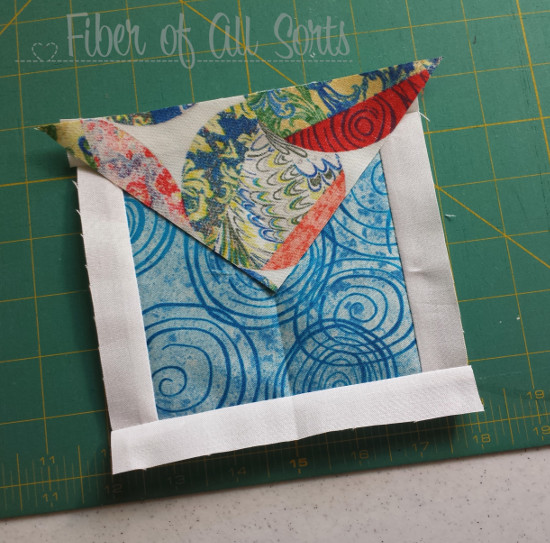
Usually I leave just a 1/4" and that is my happy medium to be able to trim down and get the pieces just right.
As a note I’m a press to the side kinda gal.  Press as you desire.
Here’s a tutorial for A Blooming Marvelous Star:
Blooming Marvellous Star.jpg
Materials:
For a 12” finished block (12.5” unfinished block)
Supplies.jpg 
Background Fabric
(blue in our example):

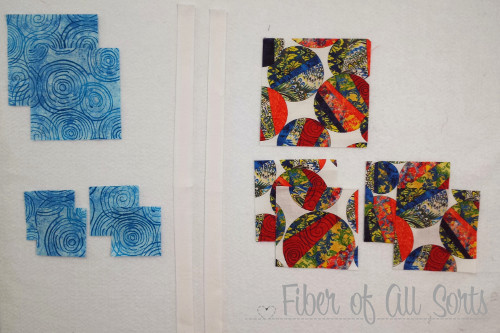
 Cut 2 – 5”  x  5”
Cut 4 – 3.25” x 3.25”
Outline fabric
(white in our example)

 Cut 2 - WOF  x 1.0”
Star fabric
(multi-tonal in our example)

 Cut 1 - 6.5” x 6.5”
Cut 4 -  5” x 5” (Cut these diagonally in half once)

Optional: Flying geese ‘Block Loc’ ruler

Construction:
1/4" seams throughout
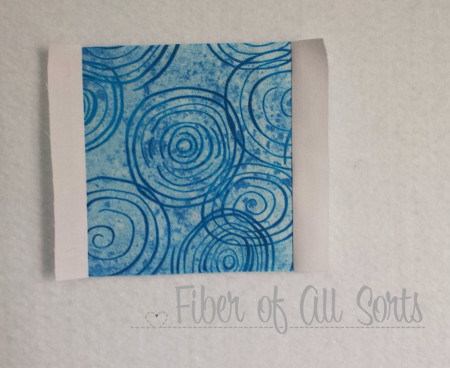
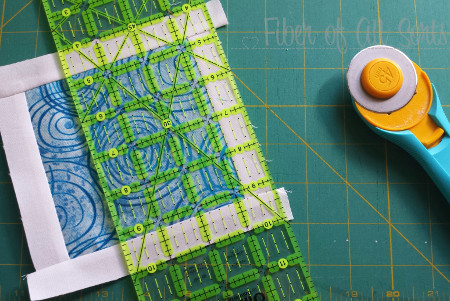
1.    Add 1.0” outline fabric (white) to all sides of the 5” x 5” background fabric pieces.
Add these first to 2 opposite sides
 Flying geese Center 1.jpg
Press, Trim
 Flying Geese Center 2.jpg
Add to the last two sides, Press,Trim

2.    Take the 5.0” x 5.0” pieces and cut them diagonally in half.


3.    Take and make a ‘square in square’ with the background with the outline fabric with the diagonal pieces made in step 2.  
I usually finger press a crease a line to match the point across from the longest diagonal.
Flying Geese Center 3.jpg
Repeat to finish with a block like this.
Flying Geese Center 4.jpg 
Make sure to repeat this for both 5.0” x 5.0” blue pieces

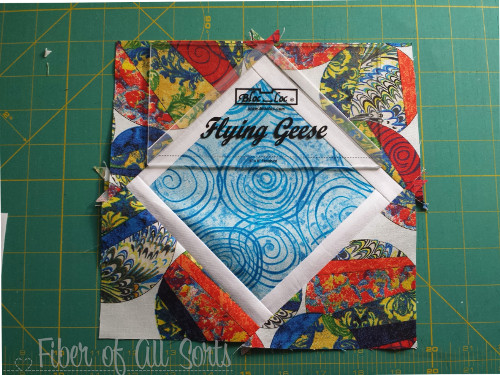
4.    Trim the created block in step 3 into 2 flying geese blocks.
These result in 4 ~ 3.5” x 6.5” flying geese blocks
This can be easily completed with a block loc ruler, but you are more than able to do this with a ruler.

Here’s the ease of a bloc loc ruler, make sure to match the point of the goose up with the outside point.
 Cutting Flying Geese 1.jpg
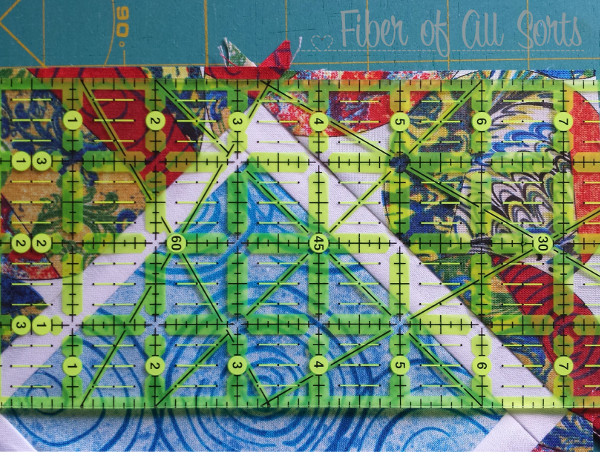
Or you can use a ruler by lining up a ruler on the point of the goose on the lines in the photo below.
Cutting Flying Geese 2.jpg 
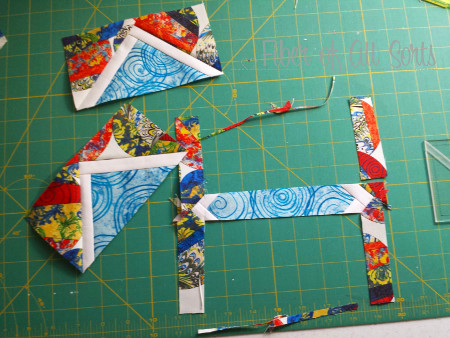
Here is the photo of the ‘waste’ fabrics. Not too shabby for such a pretty star. And the precision is what I’m always happy with.
Cutting Flying Geese 3.jpg
5.    Take the 3.25” x 3.25” background (blue) squares and add 1.0” outline fabric (white) to two adjacent sides.  As shown below.
Corner Squares.jpg 
Repeat for all four corners.
This will make the ‘highlight’ of the of the geese.
Trim these down from the white pieces to 3.5” x 3.5”

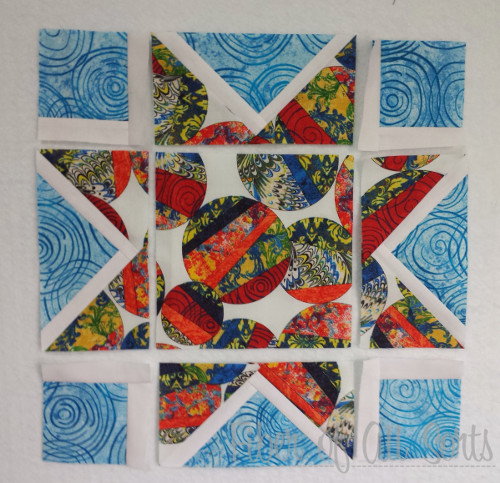
6.    You’ll be assembling the star just like a 9-patch, as shown below.
 Arrange Star.jpg

And in the end you’ll have A Blooming Marvelous Star
Blooming Marvellous Star.jpg
If you have questions, please stop by my blog at Fiber of All Sorts.


Thanks Shanna!

      For a chance to win one of 3 fat quarter bundles of Marblehead Venetian Glass, sign up to follow Inspired by Fabric (using the "follow" button or the "follow by email" button in the right hand side bar) and leave an email letting us know you did, as well as telling us--what size quilt do you make most (lap, bed, wall hanging, table runners, etc.)? You can leave a comment to enter once for each post during the Star Sampler hop (9 entries total). The giveaway will be open through Monday, March 17th at 11:59 EST, and we'll randomly pick 3 winners on Wednesday of that week. 

     Make sure you catch the tutorials for all the blocks in the sampler!
     Star #1: Connie of Free Motion by the River
     Star #2: Joanne
     Star #3: Fabri-Quilt blog team
     Star #4: Dawn from Spring Water Designs
     Star #5: Heidi from The Whimsical Workshop 
     Star #6: Fabri-Quilt blog team
     Star #8: Tammy from Tamarinis
     Star #9: Monica from Diary of a Quilt Maven