Tuesday, November 29, 2016

Pillowcases for the holidays

Today, Giving Tuesday, seems like the perfect day for a post on pillowcases. 
Giving Tuesday was started five years ago to turn the post-Thanksgiving focus to giving rather than just focusing on gifts for the holidays. According to a USA Today article, "Giving Tuesday is the brainchild of New York City cultural center 92nd Street Y and the United Nations Foundation. The official Giving Tuesday organization describes the post-Cyber Monday event this way: 'Entering its fifth year, #GivingTuesday is a global day of giving fueled by the power of social media and collaboration. … #GivingTuesday kicks off the charitable season, when many focus on their holiday and end-of-year giving.'"

As you work on your holiday to-do list, consider adding a pillowcase or two. 
You can make pillowcases to donate as part of American Patchwork & Quilting's One Million Pillowcase Challenge as they push toward the 1,000,000 goal (the number of pillowcases donated is currently 702,800+). They also do make great gift ideas, and what's better than a homemade gift? AllPeopleQuilt has 60+ different patterns to choose from!

We have two new designs from AllPeopleQuilt to share with you, shown in some of our newest fabric collections:
Pattern #60: Argyle
featuring Ro Gregg's Valor collection

Photo from AllPeopleQuilt.com; find the pattern here

 
Pattern #61: The Pillowcase Dress

featuring Barbara Eikmeier's Vintage 30s Ruby's Treasures collection
Photo from AllPeopleQuilt.com; find the pattern here

Learn more about the One Million Pillowcase Challenge here.

Wednesday, November 23, 2016

Autumn Leaves Feathered Friend

We're putting our #PSLwithPBS game bundles to work this week! 
We're letting our Thanksgiving spirit shine by sharing three quick projects made using those fun fall palettes from our Painter's Palette Solids collection. 
(See Monday's Harvest Tones Leaf Runner here and Tuesday's Modern Fall Give Thanks Banner here.)

It's the day before Thanksgiving! You might not be plucking a turkey today, but you can make its stitched cousin with a lot less work! Chicken may not be the most popular bird at Thanksgiving, but this stuffed cutie can hang out all fall without worrying about that big day in November! 


We used these Painter's Palette Solids:

This chicken, which can serve as decor or be stuffed with pellets to work as a door stopper (or even a large pincushion!) was designed by Diane Arganbright, who graciously agreed to let us share it here. 

Let's get started!

You'll Need:
Six fat quarters (Paprike, Ash, Claret, Old Gold, Jack O'Lantern, Pencil Yellow) 
Fusible web
Fiberfill
Two buttons for eyes

Cutting:
From the Old Gold:
Two 10" squares (for body)

From the Paprika:
Two 4" x 11" strips

From the Claret: 
Two 4" x 5" pieces

From the Jack O'Lantern:
One 9-1/2" square

From the Ash:
One 7-1/4" square

From the Pencil Yellow:
One 5" square

From the fusible web:
One 4" x 11" piece
One 4" x 5" piece

Download the template pieces here. Print one copy. 

Making the Chicken:
Step 1: Adhere the 4" x 11" fusible web strip between the two 4" x 11" Paprika strips. Fuse the 4" fusible web square between the two 4" Claret squares. Cut out the template shapes. Trace two wings onto the Paprika and one comb and one beak onto the Claret using a fabric marking pen. 

Step 2: Cut out the shapes. 

Step 3: Find the center of each 10" Old Gold Square. Pin a wing near the center point of each.

Step 4: Use a buttonhole stitch to secure the top curved edge of the wing to the Old Gold Square. 
Step 5: Position the beak 2" from the left corner as shown. Position the comb 1" from the top left corner as shown. Baste both in place. 

Step 6: Layer the second Old Gold square with wing on top, right sides together. Stitch along the left side (securing beak) and the top edge. On the bottom edge, stitch 2" in from each corner. 

Step 7: Fold the 9-1/2" Jack O'Lantern square in half diagonally and then in half diagonally again to create a triangle with two folded edges. 

Step 8: Repeat with the 7-1/4" Ash square and the 5" Pencil Yellow square. 

Step 9: Stack the triangles, matching raw edges, and baste. 

Step 10: Pull the chicken so the seams align, with the comb on top. Tuck the tail triangles inside, also facing up. Align the center of tail long edge with the two seams. Pin in place. 

Step 11: After the tail is pinned in place, pin the bottom body edge as well. Sew along this edge, securing the tail between the two body sections. 

Step 12: Turn right side out through the remaining opening. 

Step 13: Stuff with fiber fill to desired firmness. Whipstitch the opening closed. Add black buttons for eyes. 

Enjoy!

Our chicken was romancing this ceramic chicken. :) 


We hope you enjoyed our Thanksgiving Day themed tutorials this week using our Painter's Palette Solids!
Wishing you and your family a wonderful and relaxing Thanksgiving! 

Tuesday, November 22, 2016

Modern Fall Banner Tutorial

We're putting our #PSLwithPBS game bundles to work this week! 
We're letting our Thanksgiving spirit shine by sharing three quick projects made using those fun fall palettes from our Painter's Palette Solids collection. 
(See yesterday's Harvest Tones Leaf Runner here.)

Today's project, using the Modern Fall palette, is quick, easy and practically no-sew! 


We used these Painter's Palette Solids:

Like yesterday's project, you can make this with six fat quarters. Each letter block measures approximately 4" x 5". 

Let's get started!

You'll Need:
Six fat Quarters (Mahogany, Cumin, Wheat, Maroon, Mocha and Teal)
Batting
Approximately 7' of jute
Fusible web
Pinking shears or rotary cutter with pinking blade
Ten miniature clothespins

Click here to download the letter templates. Print one of each page. 

Cutting: 

From the Mahogany: 
Adhere fusible web and then cut ten 3" x 4" pieces

From each of the Wheat and Teal:
Six 5" x 6" pieces

From each of the Maroon and Mocha: 
Four 5" x 6" pieces

From the Cumin:
Print out the letter template pages. Trace onto the paper side of fusible web. Adhere the fusible web to the fabric and cut out one of each letter on the traced lines. Remove paper backing from the letters. 


From the batting: 
Ten 5" x 6" pieces


Make the Banner:
Step 1: Layer a batting piece between two teal pieces. Spray baste or pin if desired; these pieces are small enough (and we'll be trimming the outside edge later), so you don't need to secure the layers unless you want to. 

Step 2: Fuse a 3" x 4" Mahogany piece centered on the teal piece. Again, you can measure, or you can simply eyeball it, as we'll be trimming later. 

Step 3: Stitch 1/4" from the outer edge of the Mahogany piece. Stitch 1/4" past the outer edge of the Mahogany piece. 

Step 4: Using a pinking shears or rotary cutter with a pinking blade, trim all sides approximately 1/4" past the outer stitching line. You can measure and mark if you like, or just eyeball it. (We told you this was easy!)

Step 5: Repeat steps 1-4 to create ten quilted sandwiches; three each of Teal and Wheat and two each of Maroon and Mocha. Lay out the quilted sandwiches in the order you prefer and position the letters in place. 

Step 6: Fuse the appropriate letter to each quilted sandwich. 

Step 7: Use miniature clothespins to attach letters to the length of jute. Hang and enjoy!


Monday, November 21, 2016

Harvest Tones Leaf Runner

Remember our #PSLwithPBS game
We're getting into the Thanksgiving mood this week by sharing three quick projects made using those fun fall palettes from our Painter's Palette Solids collection.

Today is the Harvest Tones Leaf Runner:


We used these Painter's Palette Solids:


Just three blocks--it goes together pretty quickly, and you can sew the whole runner (including binding) from six fat quarters. The runner (or door hanging!) measures 14" x 42"

Let's get started!

You’ll Need:
Six fat quarters: Bronze, Bordeaux, Gold, Old Green, Wasabi, and Burnt Sienna
½ yard backing fabric
18" x 45" piece of batting
Printer paper or foundation paper
fabric marking pen

Cutting
From each of the background colors (Bronze, Gold, Wasabi):
One 3-1/2” x 10-1/2” strip
One 3-1/2” x 13-1/2” strip
One 1-1/2” x 13-1/2” strip
One 1-1/2” x 14-1/2” strip
One 4-1/2” square
One 4-1/4” square
(2) 2-1/2” x 4-1/2” pieces
(6) 2-1/2” squares
(2) 2-1/2” x 5-1/2” pieces (for paper piecing)

From each of the leaf colors (Bordeaux, Old Green, Burnt Sienna)
(2) 2-1/4” x 21” strips for binding (you may need one extra strip total, depending on how you add your binding)
(5) 2-1/2” x 4-1/2” pieces
(2) 4-1/2” squares
(1) 2-1/2” x 6-1/2” piece
(1) 5-1/2” square (for paper piecing)

Click here to download the paper piecing pattern. You’ll need to print three copies.

Make the Blocks
Note: Sample block made using Bronze and Bordeaux.
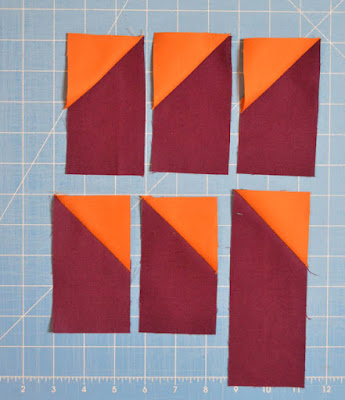
Step 1: Draw a diagonal line on the wrong side of each 2-1/2” Bronze square. Noting orientation in the photo below, lay the marked squares on the five 2-1/2” x 4-1/2” Bordeaux pieces and the one 2-1/2” x 6-1/2” Bordeaux piece. Note: Direction of the diagonal line DOES matter! 


Step 2: Stitch on the drawn lines, trim seam allowance to ¼” and press open.


Step 3: Use the (1) 5-1/2” Bordeaux square and the (2) 2-1/2” x 5-1/2” Bronze pieces with the paper piecing pattern to create the paper pieced star tip unit. Trim unit ¼” past the solid line and remove paper. Tip: Don’t forget to set your stitch length shorter when you paper piece!


Step 4: To make the stem unit, draw diagonal lines on the wrong side of both 4-1/2” Bordeaux squares. Lay the first marked square on the 4-1/4” Gold square as shown, noting where the extra size of the Bordeaux square is positioned. Stitch on the drawn line, trim the excess, and press open.


Step 5: Repeat with the remaining marked square on the opposite side of the Gold square. Square up unit to measure 4-1/2” if needed. 


Step 6: Lay out the units from Step 2, the star tip unit, and stem unit, and the two 2-1/2” x 4-1/2” Gold pieces as shown to create the block. Sew the units together as shown to make three separate sections. Join the bottom two sections and then add the top section to complete the block.


Step 7: Repeat Steps 1-6 to make two additional blocks.


Making the Runner
Step 1: Lay out the one 3-1/2” x 10-1/2” Gold strip, one 3-1/2” x 13-1/2” Gold strip, one 1-1/2” x 13-1/2” Gold strip, and one 1-1/2” x 14-1/2” Gold strip around the Gold/Bordeaux block as shown. Sew each piece on, beginning with the 3-1/2” x 10-1/2” piece and working your way around the block. Repeat for the remaining two blocks.


Step 2: Lay out the three bordered blocks as shown. Sew the blocks together in a row.


Step 3: Layer the runner top with backing and batting and quilt as desired.

Step 4: Use the (6) 2-1/4” x 21” binding strips to bind the runner.


Thursday, November 17, 2016

The "America" quilt

Earlier this week, during our Quilt Market booth tour post, we showed you the "America" quilt. Today, designer Cynthia Wismann is here to tell us more about this amazing design, as well as share a few process shots from when she was making it. 


Q. What fabrics did you use in the quilt?
CW: I used the Valor line [by Ro Gregg] and the Painter’s Palette Solids. I think I used 47 different colors from the solid line. I wanted to use as many as I could. The makeup of America changes across the U.S. and I wanted to reflect that in a variety of colors.

Q. How did you come up with idea for the quilt?
CW: Paintbrush Studio asked me to make a quilt with the Valor collection. I talked about design ideas with friends on a retreat and then with my daughter. I knew I wanted one big American flag that looked like it was flowing, but I also wanted to make the quilt look like America, like the people of America. I felt really honored to do a Valor quilt in an election year. I wanted to show our true colors—America from east to west. Houses, fire departments, high rises, Hollywood, farmland, lakes...


Q. How did you design this quilt?
CW: I I taped pieces of butcher paper together and drew on it with pencil to create a full-size sketch. I did a ton of erasing! I wasn’t sure how I would grid it out, but my daughter suggested 15” squares, four across and four down. 

I started drawing the red, white and blues. I wanted the blue to look as though it was the beginning of the flag, with the flag continuing on. For the red sections, I went with a fusion of all the different reds in the Valor collection. I knew I wanted the houses to be in the center, between the red and blue sections.

My daughter suggested the eagle watching over because the eagle represents America. I chose a sturdy oak tree.

Q. Why is this quilt so special to you?
CW: I I have family members that were in the military and I feel like this quilt would be a tribute to them. After 9/11, I worked with our guild to make little star quilts to hang in the windows of families with service members. My mom said that my grandma had done something similar during WWII. When I was asked to make a quilt with the Valor prints, it touched my heart—it was a connection to my grandmother.


Q. How did you construct the quilt?
CW: The whole quilt was fused onto cotton batting. I made my 15" squares where I could, in the red and blue sections. I made the whole America scene separately, as one big flowing piece that I added later. I built the tree and eagle separately and added them last.
 
Seeing how the various pieces will look together


The technique I used for the tree, eagle and stars is to fuse the shapes to felt. Then I stitch on it. Both the tree and the eagle had a fair amount of quilting. Then I freeform cut next to the stitch line so a little bit of the felt shows and creates a slight dimensional look.


To finish the quilt, I fused the blocks and the row of houses to the batting, and then I steamed it and fused the backing to the back of the batting. It was really heavy to quilt!
I quilted it and then added the tree and the eagle. Last were the stars. I just laid them out without a set pattern, just following the sky.

The binding is a facing. It’s a nice finish, especially since I wanted it to look like the flag was continuing on, rather than a regular binding.

Q. What was your favorite part of making this quilt?
CW: Designing it. And then seeing that it all came together and worked—going from the drawing, making sure the fabrics all worked, and seeing the end result. I think it worked because the Valor collection all goes together so well.


Thanks, Cynthia, for telling us about your beautiful quilt!

Find more of Cynthia's work here
See the entire Valor collection here.
See the entire Painter's Palette Solids collection here.