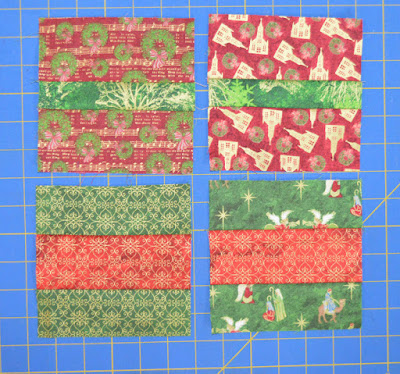
We're celebrating the season with 12 days of holiday-themed block tutorials using Ro Gregg's gorgeous and glittering Silent Night collection. Make sure you catch all of the tutorials, and then we'll show you how to assemble the blocks into a sampler quilt!
Today is the Ornament Block! Much like the stocking block, it's actually made up of multiple units that are joined together. There are two different ornaments--one with a thinner stripe (ornament A) and one with a wider stripe (ornament B).
Cutting:
From the cream:
Two 2-1/2" x 6-1/2" pieces
Sixteen 2" squares
Eight 1-1/2" x 2-3/4" pieces
From each of red #1 and red #2:
Two 2-1/2" x 5-1/2" pieces (Ornament A)
From red #3:
Two 2-1/2" x 5-1/2" pieces (Ornament B)
From green #1:
Two 1-1/2" x 5-1/2" pieces (Ornament A)
From each of green #2 and #3:
Two 2" x 5-1/2" pieces (Ornament B)
From the gold/black:
Four 1" x 1-1/2" pieces
Step 1: To start Ornament A, sew 2-1/2" x 5-1/2" red pieces to opposite long sides of one 1-1/2" x 5-1/2" green piece. To start Ornament B, sew 2" x 5-1/2" green pieces to opposite long sides of one 2-1/2" x 5-1/2" red piece.
Step 2: Make a second Ornament A and Ornament B unit.
Step 3: Draw a diagonal line on the wrong side of four 2" cream squares. Lay the marked cream squares on an Ornament A unit as shown.
Step 4: Stitch on the drawn lines, trim seam allowance to 1/4", and press each corner open to complete an ornament body.
Step 5: Repeat on the remaining three ornaments.
Step 6: To make the ornament top, sew 1-1/2" x 2-3/4" cream pieces to opposite sides of one 1" x 1-1/2" black/gold piece. Make four.
Step 7: Sew an ornament top to an ornament.
Here's the finished block:
See the entire Silent Night collection here and ask for it at your local quilt shop.


I love the cute top on the ornaments. A nice block. Thanks.
ReplyDeleteLove these! Thank you!
ReplyDeletegoogle 208
ReplyDeletegoogle 209
google 210
google 211
google 212
google 213
google 214