Christmas is only 69 days away!
On the eighth day of Christmas, we have:
An easy kitchen table topper from Rebecca of Our Busy Little Bunch, featuring the Season's Greetings collection
For this project you will need:
- fat quarter of each reindeer print
- half yard ornament print
- half yard blue tonal print (for sashing, binding, and backing)
 |
| Season's Greetings fabrics |
Cut:
reindeer prints - 12.5" square from each
ornament print - Three 10.75" squares, one 10" square
blue tonal print - 1.5" sashing - six pieces 10" long, six pieces 12" long
(use rest of blue tonal for binding and backing piece later)
Start by cutting your reindeer prints into quarters, corner to corner. You will only need three, so discard one of them.
Now take your 10" long pieces of sashing and sew to one short side of each triangle. Start at the top point, and let the strip extend past the bottom. Press.
Using your ruler and rotary cutter, trim the strip as seen below to make the edges even:
Add the 12" long pieces of sashing to the other short edge of each triangle and trim, just as you did above. You will now have six half triangles that have been sashed on the two short sides.
Now take your 10.75" ornament squares. Cut two of them in half to form two triangles like below:
And cut one in quarters to form four triangles:
Lay out your sashed triangles and ornament triangles in the following pattern. Sew the top row, then the bottom row, pressing as you go along. Then sew the two rows together.
Make sure to match seams when sewing, and let points overhang:
Take your remaining 10" square and cut in half into two triangles and add to ends of runner.
And there you have it, a quick and easy table runner that you can quilt and bind and get on that table before Christmas! Finished measurements are 14" x 56".
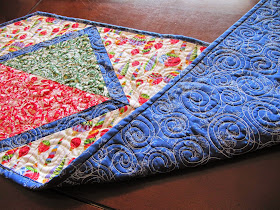
Using the scraps, and another coordinating print from the collection, I also made a little matching runner for my coffee table. It was the perfect size for practicing a new method of quilting before quilting this one. Come pop by my blog Our Busy Little Bunch to have a look. And I'll be back with another Christmas table topper tutorial for a round kitchen table soon!
The 12 Days of Christmas:
Day 11


Very pretty and she made it look so easy to make.
ReplyDeleteLovin' that ornament fabric.
ReplyDeletelove both
ReplyDeleteLove this Runner!! the quilting is AWESOME too!
ReplyDeleteThanks for the tutorial.
ReplyDeletecute cute!! I love the quilting too, thanks for sharing
ReplyDeleteGreat runner. I love the ornament fabric combined with the others. Very pretty
ReplyDeleteYour table runner is great. I liked your tutorial. It was very helpful.
ReplyDelete