Friday, July 31, 2015

Blue Moon!

In honor of tonight's blue moon, a phenomenon we won't see again until 2018, we're sharing some of our favorite blue fabrics!


(Photo courtesy)
This moon appears blue because of a filter used on the camera!


First, a few blue moon facts, courtesy of CNN.com:


  • Blue moons aren't actually blue! It's just the phrase used when the moon is full twice during a month
  • The last blue moon occurred in 2012; the next will occur in 2015
  • The phrase "once in a blue moon" comes from the idea of something that happens rarely, like actual blue moons

Find out more here.
Find tips for moon watching here.


Blues from Ro Gregg's Marblehead collection


Blues from Ro Gregg's Marblehead and Pleasing Pastels collections


Blues from the Shadows collection
And if you're participating in the Row by Row experience, these blue prints will be prefect for this year's H2O theme! Ask for them at your local quilt shop.


One more kind of blue moon--this one is tasty!


Wednesday, July 29, 2015

Tute-Happy Summer: Elegant Clutch

We're continuing our Tute-Happy Summer series today with a tutorial for an elegant clutch made using two fun prints from the Jungle Party collection. Enjoy the tutorial and then find the details at the bottom of this post for a chance to win a bundle of Jungle Party prints to play with!


Combine a cool indigo snakeskin print with...

a fun lime zebra print lining!

Materials:
1 fat quarter each indigo snakeskin print, lime zebra print and black solid
1/2 yard each Peltex and fusible fleece
1 magnetic snap
Paper and rounded object (we used a roll of masking tape) for template

 Step 1: Cut a 5-1/2" square from the paper. Round one corner using an object like a roll of masking tape or a bowl. This is your template for the clutch.

Step 2: Fold the indigo snakeskin print in half, wrong sides together, and place the template on top so one of the straight edges is aligned with the fold.  Tip: Press the fabric fold with the iron before laying the template on top and cutting.

Step 3: Cut 2 clutch shapes from the indigo snakeskin and 2 from the zebra print, with the curved edges by the zebra feet. Cut 2 clutch shapes from the fusible fleece. Cut two 5" x 10-1/2" pieces of Peltex and round the outer bottom corners using the template as a guide. Fuse the fleece to the wrong side of zebra pieces and the Peltex to the wrong side of the snakeskin pieces, centering the Peltex so there is a fabric border around all sides.


Step 4: Cut an 8" x 11" black solid rectangle and fold in half to measure 4" x 11". Topstitch along the fold and position on one zebra lining piece, matching raw edges at the bottom. Pin in place and sew along the sides and bottom using a scant 1/4" seam allowance. 

Step 5: Flip the lining piece over and trim off the black corners to match the clutch shape. 

Step 6. Layer the two snakeskin pieces right sides together and stitch around sides and bottom. Measure 2-1/4" down from the top edge, center left to right, and insert half the magnetic snap. Turn right side out.


Step 7: Layer the two zebra pieces right sides together and stitch around the sides and bottom, leaving a 6" opening for turning.  

Step 8: Fold or trim the template so it measures 4-1/4" tall to make the flap template.

Step 9: Cut out 1 flap shape each from the snakeskin and the zebra print (note the zebras should be upside down, with their heads by the curved edges). Cut out 1 flap shape from the fusible fleece, and cut 1 Peltex piece measuring 3-3/4" x 10-1/2" and trim curved corners. Fuse fleece to the zebra piece and Peltex to the snakeskin piece. 

Step 10: Layer flaps right sides together and stitch around the sides and bottom. Turn right side out and topstitch. 

Step 11: Measure 3" from straight edge and centered left to right, insert other half of the snap onto the zebra side of the flap.


 Step 12: Position the flap against the back (non snap side) of the outer bag, snakeskin sides touching and raw edges matching along the top. Pin in place and stitch to secure. 

 Step 13: Tuck the outer bag/flap combo into the lining, right sides facing. Line up side seams and pin the raw edges along the top. 


Step 14: Stitch along the top edge and turn clutch right side out through opening in the lining. Stitch the opening closed, and tuck the lining inside the clutch. Press well.  You're done! 


For a chance to win a bundle of Jungle Party prints, leave us a comment letting us know that you follow us on the blog or on Facebook. Also tell us--do you use clutches, or do you need a purse with a strap? Giveaway is open through Sunday, August 2nd at 11:59 pm EST. This giveaway is now closed, but be sure to check out our other tutorials, as we'll be sharing a tutorial and hosting a giveaway each week!


Check out each week of our Summer of Tutes!
Week 1: Sunglasses case  featuring Graphix 3
Week 2: The overnight bag featuring Who's Who

Week 3: Tablet case featuring Jungle Party 
Week 4: Patriotic pennants featuring Tone on Tone 
Week 6: Zig zag lunchbag featuring Graphix 3


************************************************************************
Announcing our Table Topper Marblehead Pleasing Pastels bundle winner:

Crickets Corner

Congratulations!


Tuesday, July 28, 2015

Back to School

It's that time of year again...when big box stores are stocked with aisle after aisle of school supplies!
While it may feel like it's too early to start thinking about a new school year, it's the perfect time to being a school-themed sewing project--maybe a gift for a teacher in your life or for an aspiring student!

Check out our Back to School collection:

Use this double-sided pre-quilted fabric to make a quick tote or easy backpack!


See the entire Back to School collection here.

Friday, July 24, 2015

Pillowcase Time!

American Patchwork & Quilting has posted the two latest pillowcase patterns as part of the 1 Million Pillowcase Challenge!

First up is the Bull's Eye Band, shown here in our Briarcliff fabrics.

And second is the Square-in-a-Square band, shown here in our Vera Cruz fabrics.


Find and download both patterns here.

Thursday, July 23, 2015

Tute-Happy Summer: Table Topper

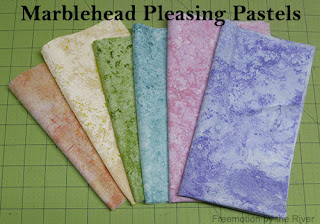
We're continuing our Tute-Happy Summer series today with a tutorial for a simple, cheery table topper by Connie from from Freemotion by the River. Connie used the soft prints from the Ro Gregg's Marblehead Pleasing Pastels collection. Enjoy the tutorial and then find the details at the bottom of this post for a chance to win a bundle of Pleasing Pastel prints to play with!


Hi, I'm Connie from Freemotion by the River and I have another quick and easy pattern to share with you. Last week I made placemats with the Marblehead Pleasing Pastels fat quarter bundle and today I have a table topper that will look perfect with them!
Pastel Table Topper


Marblehead Pleasing Pastels used in topper Marblehead Pleasing Pastels used in topper

The size of this table topper is 24" x 24".
From the fat quarter bundle I choose 5 colors and a cream. If you make this, you will actually need 2 fat quarters of the cream to get all of the pieces.

 Cut the following:
  • 20 - Pink - 2 1/2 inch x 2 1/2 inch squares
  • 20 - Teal - 2 1/2 inch x 2 1/2 inch squares
  • 32 - Cream - 2 1/2 inch x 2 1/2 inch squares
  •   8 - Green - 2 1/2 inch x 2 1/2 inch squares
  •   8 - Pink - 4 1/2 inch x 4 1/2 inch squares
  •   4 - Purple - 2 1/2 inch x 4 1/2 inch rectangles
  •   4 - Peach - 2 1/2 inch x 4 1/2 inch rectangles
Sew all seams with a 1/4" seam allowance.

This is a simple pattern that combines two different blocks.

Block One:

Make 4 Pink and 4 Teal 9 patch blocks. Each 9 patch will use 5 of the pink or teal and 4 of the cream.
Diagram for block one

 Block Two:

Make 8 of these. Use the following diagram for placement for block two.
Diagram for block 2

You will make:

4 - Teal/cream 9 patch blocks
4 - Pink/cream 9 patch blocks
8 - Purple/Peach/Green/Cream blocks

Lay your blocks out as shown below.
second block

Sew the 4 blocks together. Make 4.
piecing the blocks

Sew the 4 large blocks together to make your table topper.
4 large blocks to make the table topper

Quilt as desired.
Cut 2 1/2" strips from the leftover fat quarters to make the binding.

I hope you enjoyed this tutorial and stop by my blog for more pictures of this table topper.
Table topper on the deck


For a chance to win a bundle of Marblehead Pleasing Pastels prints, head over to Connie's blogThis giveaway is now closed, but be sure to check out our other tutorials, as we'll be sharing a tutorial and hosting a giveaway each week!

Check out each week of our Summer of Tutes!
Week 1: Sunglasses case  featuring Graphix 3
Week 2: The overnight bag featuring Who's Who

Week 3: Tablet case featuring Jungle Party 
Week 4: Patriotic pennants featuring Tone on Tone 
Week 6: Zig zag lunchbag featuring Graphix 3
Week 9: Elegant clutch featuring Jungle Party 
Week 10: Modern table runner featuring Prairie Cloth Solids 

************************************************************************
Announcing our Summer placemats Marblehead Pleasing Pastels winner:
Happy Cottage Quilter
Congratulations!

Wednesday, July 22, 2015

Drumroll, please!


Announcing our Pin It & Win! prize package winner:

Lori M (bearpaws9) who pinned the Overnight Bag!

Congratulations, Lori!

A big thank you to everyone who pinned one of our tutorials and is also now following us on Pinterest! 

Tuesday, July 21, 2015

Krazy Kritters

The cute animals in our new Krazy Kritters collection are perfect for an adorable kid's quilt! We've paired them with various coordinates to offer you some bright, ready-to-go color combinations.

Clockwise from to left: Krazy KrittersClassiqueClassique, and Eggcellent Adventures

Clockwise from to left: Krazy KrittersClassique, Truck Stop,  Marblehead Global Brights

Clockwise from to left: Krazy KrittersMarblehead Global Brights, Marblehead Gemstones, Jewels & QuartzTruck Stop

Clockwise from to left: Krazy KrittersTruck Stop, Marblehead Gemstones, Jewels & Quartz, and Leather

Clockwise from to left: Krazy Kritters, ClassiqueMarblehead Global BrightsTruck Stop

Clockwise from to left: Krazy Kritters, Eggcellent AdventuresMarblehead Gemstones, Jewels & Quartz, and Eggcellent Adventures

See the entire Krazy Kritters collection here.

Friday, July 17, 2015

Truck Stop 2-in-1

We call our new Truck Stop collection a 2-in-1. 
Why is that? 
Truck Stop's colorful prints are perfect for making a truck-themed quilt for a little one! 


But, the fun coordinates (zigzags and dots!) can also stand alone to make a cheery quilt for anyone, not just truck lovers.


How's that for some multipurpose prints?!

If you're planning to go the truck-themed route, try the Truck Stop Quilt designed by Hedgehog Quilts, available as a free download on our website:

See the entire Truck Stop collection here.
Find the free quilt pattern here.