Pages

Tuesday, June 30, 2015

Tute-Happy Summer Winners!

Have you been following along with our Tute-Happy Summer posts? 


Here are the randomly selected winners from the last few posts; they'll be receiving fabrics featured in the tutorial.
Enjoy!

Week 2: The overnight bag featuring Who's Who
Congratulations to Lori!


Week 3: Tablet case featuring Jungle Party 


Congratulations to Jasmine!


                                Week 4: Patriotic pennants featuring Tone on Tone

Congratulations to Debra!


Winners, we have emailed you for your mailing addresses.

Be sure to stop by tomorrow for this week's tutorial!

Friday, June 26, 2015

4 Little MonStars in Solids

Back in May, we did a post that "toured" our Quilt Market booth. One of the quilts we showed you was the "4 Little MonStars" quilt by Rebecca Bryan, an adaptation of a pattern from her Modern Rainbow book, using our Prairie Cloth Cotton Solids. Today we're back with more photos of this cool quilt, as well as the story behind it from Rebecca.


Q. Where did the MonStar pattern idea come from? And the idea to shrink it down for 4 Little MonStars?
Rebecca: Initially, I wanted to try a different approach to the traditional Lone Star quilt pattern. As you make the MonStar spokes, you start with a small star and keep building until you end up with a bigger star. Naturally, as I laid out my original MonStar in it's smaller stages I thought what an adorable little star it was. It'd make a great baby quilt! For Fabri-Quilt, instead of making 1 little MonStar, I just made 4 little MonStars. 


Q. Tell us why you like using solids so much.
Rebecca: Solids draw me because of their consistent and simple color. I can't really place why I like using solids so much but I always have. I recall suggesting to my mother that she use solids in one of her quilts - maybe it was a dress - when I was small. She turned me down but I think at that time the options for solids were limited to broad cloth. 
Some of my favorite antique quilts use quite a bit of solids. I have one with a blue solid, one with a pink solid, one with a green solid, and another with a purple solid. Maybe I just chose those quilts for their solids!?


Q. Can you talk about the palette you selected for the Little MonStars quilt?
Rebecca: After having received the color card for the Fabri-Quilt solids, I took a good look at the colors to get a sense of what I could work with. Then I hit up my Pinterest color inspiration board. Wanting to use a bright and funky color scheme, I chose several of my pinned color schemes. Then I used Adobe Illustrator to sketch up 4 Little MonStars and play around with the Fabri-Quilt colors. There were probably 8 or 12 different color schemes I liked - it was hard to only choose 4! 


Q. Love the straight line quilting! Why did you take that approach?
Rebecca: The straight line quilting is both necessary and decorative in this quilt. I used the straight line quilting to top stitch each MonStar to the whole cloth background. From there I just continued the straight line stitching throughout the background. 


Q. What advice would you give to someone interested in this quilt but feeling intimidated?
Rebecca: I'd say start small! This quilt can be easy and fun, but the larger version can become a bit unwieldy in that the sizing can easily drift. Don't be tempted to skip measuring for each border. The measurements keep the unwieldiness in check!


Q. Can you tell us a bit about your new Modern Rainbow book and how it came about?
Rebecca: Sure! Thanks for asking! So a few years ago I was a stay at home mom with my 4 kiddos. My youngest at the time was just a baby, 6 months old I think. In any case I was quilting and blogging and I was becoming rather obsessed with it, so much so that I found it hard to concentrate on anything else. I felt I couldn't settle down. 
My mind would wander off into pattern design and I was annoying myself. 
So while at church in early December 2012, the worship leader asks the congregation if there's anything getting in the way of worship, anything distracting you, ask the Holy Spirit to help you set that aside. So I prayed something like "God if there's something you'd like me to do with this passion for making and quilting, please show me something. If not, please quiet my mind so I can focus on what you want for me."
That night, or a few nights later, I dreamt that a friend of mine wrote a book about rainbow quilts. I woke up frustrated and jealous of my dream friend. I was rather cranky until I realized God had provided an answer to my prayer. I could write a book about rainbow quilts. 
So with that vision in mind, I set off on my journey of writing my first book. It was an amazing experience both spiritually and as a first time author. 


Read Rebecca's post on her quilt here.
Find her book here.

Wednesday, June 24, 2015

Tute-Happy Summer: Patriotic Pennants

We're continuing our Tute-Happy Summer series today with a tutorial for an easy string of patriotic pennants so that you'll be ready to decorate the backyard or front fence for the 4th of July! We've chosen red and blue tonals from the Tone on Tone collection to show off our red, white and blue spirit. Enjoy the tutorial and then find the details at the bottom of this post for a chance to win a bundle of Tone on Tone prints to play with!


Materials:
1/4 yard of red tonal #1
1/2 yard of red tonal #2
1/4 yard of blue tonal #1
1/2 yard of blue tonal #2
1/3 yard of white solid
22" x 27" piece of lightweight interfacing
5" x 15" piece of fusible web
1 package of white extra wide double-fold binding tape

Here are the two blue and two red tonals from the Tone on Tone collection--nice and patriotic! We used red #2 for the backing on the striped pennants and blue #2 for the backing on the blue pennants.
Cutting:
From red tonal #1:
Two 2-1/4" x 42" strips
From red tonal #2:
One 2-1/4" x 42" strips
Three pennant shapes (see instructions for cutting the template below)
From blue tonal #1:
Two pennant shapes
From blue tonal #2:
Four pennant shapes
From the white solid:
Two 2-1/4" x 42" strips
From the interfacing:
Three pennant shapes

Step 1: To make the pennant template, fold an 8-1/2" x 11" piece of paper in half lengthwise and then open it back up. Measure 10" and draw a horizontal line. Draw a line from each upper corner to the point where the center fold meets the horizontal line. Repeat from opposite upper corner. Cut out on the diagonal lines.
Step 2: Draw a line down the center of the pennant and then draw lines 7/8" on either side of the center line. These will be reference lines for matching the template to pieced red and white stripes.

Step 3: Click here to download the star template. Trace three star shapes onto the paper side of fusible web. Cut out loosely around the shape, press to wrong side of white fabric, and cut out on drawn line. 

Step 4: Measure 1" down from the top edge of a blue pennant to position the top point of the star, center it from left to right, and fuse in place. Make three star pennants--two on blue print #1 and one on blue print #2.

Step 5: Pair a blue pennant back right sides together with a star pennant. Layer the interfacing on top and pin all layers together. Tip: Cut off the tip of the interfacing--it will make it easier to achieve a nice point on the pennant after turning right side out.


Step 6: Stitch along the two diagonal edges of the pennant, leaving the top edge open. Backstitch at the beginning and end. Turn right side out and press. Repeat for all three blue star pennants. 

Step 7: Stitch 2-1/4" x 42" white strips lengthwise on opposite sides of the 2-1/4" x 42" red tonal #2 strip. Stitch 2-1/4" x 42" red tonal #1 strips to the white strips. Press the strip set well. 

Step 8: Square off one short end of the strip set and position the pennant template on top. Use the pencil lines on the template to center it on the strip set. With a rotary cutter and ruler, cut out a pennant shape. Repeat to cut a total of three pennant shapes.


Step 9: In the same manner as Step 5, pair a striped pennant right sides together with a red pennant back. This time layer the interfacing on the bottom so you can see the stripes as you stitch to make sure everything stays straight. Stitch the pennant, backstitching at top and bottom, turn right side out, and press. Make three.


Finished pennants:

Step 10: Square off the top of each pennant, removing any seam allowance that sticks out.
Step 11: Find the center point of the white bias tape and mark with a pin. Open the bias tape along the center fold and insert a striped pennant so the corner is 1" from the center mark. Close the bias tape with the pennant raw edges sandwiched inside and pin. Add a blue star pennant in the same manner 1" out from the opposite side of the center mark. Continue adding alternating pennant designs working out from the center, spacing the points 2" apart. 

Step 12: Beginning at the one end of the bias tape (not just where the pennants begin) stitch along the entire length, securing each pennant as you sew. 

You're done! Hang and enjoy!


For a chance to win a bundle of Tone on Tone prints, leave us a comment letting us know that you follow us on the blog or on Facebook. We'd also love to know what your favorite 4th of July tradition is. Giveaway is open through Sunday, June 28th at 11:59 pm EST.
This giveaway is now closed, but be sure to check out our other tutorials, as we'll be sharing a tutorial and hosting a giveaway each week!


Check out each week of our Summer of Tutes!
Week 1: Sunglasses case  featuring Graphix 3
Week 2: The overnight bag featuring Who's Who

Week 3: Tablet case featuring Jungle Party 
Week 5: Melon mini featuring Gemstones, Jewels and Quartz
Week 6: Lunch bag featuring Graphix 3
Week 9: Elegant clutch featuring Jungle Party 
Week 10: Modern table runner featuring Prairie Cloth Solids 

Tuesday, June 23, 2015

Feeling Patriotic? Our Top 10

With the 4th of July right around the corner, it's the perfect time to share our favorite red, white and blue fabrics, ready for your next patriotic-themed project! Check out our top ten (shhh...it's actually 11!) and visit your local quilt shop to get started! 

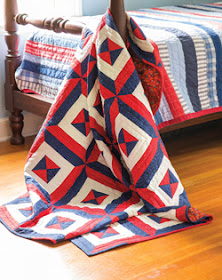
1. "Old Glory" by Pine Tree Country Quilts featuring the Tone on Tone snack pack
Find the free quilt pattern here


2. Cool nature-inspired reds and blues from Marblehead Gemstones, Jewels & Quartz by Ro Gregg


3. A touch of Americana with Vintage Shirting and Dress Prints collection by Barb J. Eikmeier

4. "Freedom Squares" quilt by Jean Nolte; featured in Quilting Quickly Winter 2014 using the Tone on Tone snack pack
Find the Quilting Quickly issue or purchase the individual digital pattern here


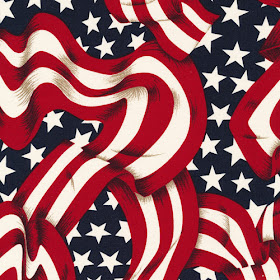
5. Waving flags all ready to use in the Headgear collection!


6. Go geometric with the reds and blues from Graphix 3


7. Keep it classic with textured tonals in reds and blues from Marblehead by Ro Gregg


8. Another free snack pack quilt pattern: "Vintage Stars" by Barb J. Eikmeier featuring her Vintage Shirting and Dress Prints collection
Watch for this free pattern soon here on our blog!


9. Small-print coordinates take center stage in the reds and blues from Classique


10. Feeling leafy? Darks and lights play well together in the reds and blues from Shadows


11. And a bonus, because we couldn't narrow it down to 10! A third free quilt pattern featuring a snack pack--this time the Bella Casa snack pack in the "Flags Forever" quilt by Airborne Heirlooms
Download the free quilt pattern here