Pages

Wednesday, July 30, 2014

Design Your Own Palette!

When you head to your local quilt shop, sometimes fabric shopping by collection is the way to go--the designer and fabric company worked hard to put together a well-rounded grouping of colors, different-sized motifs, and blenders--and you can't go wrong by taking their advice.

But sometimes, depending on the project, it's fun to mix and match fabrics, creating your own "collection." We've done just that today--selecting a focal print and then picking four coordinating prints that actually come from other fabric collections. We hope you enjoy our picks and use them as inspiration for your own!

Main print: Calypso Goldfish
Coordinating prints (clockwise, from upper left):


Main print: Imagine This
Coordinating prints (clockwise, from upper left):


Main print: Bella Casa
Coordinating prints (clockwise, from upper left):


Main print: Tweet
Coordinating prints (clockwise, from upper left):

Which is your favorite?

Monday, July 28, 2014

Calypso Winner!

Congratulations to Catskill Quilter, who was randomly selected as the winner from Bethany's Calypso Tote Tutorial last week. 


Thanks so much to everyone who visited the blog and commented on Bethany's tutorial, on both our blog and hers!

p.s. If you missed the tutorial, you can find it here

Friday, July 25, 2014

Pillowcase Friday!

We love being part of the 1 Million Pillowcase Challenge, put on by American Patchwork & Quilting. Each quarter, APQ shares two new pillowcase designs and then makes samples using fabric from the initiative's sponsors.

The official pillowcase count is 562, 223 as of today's post--over halfway to the 1,000,000 goal--great job APQ and quilters across the world! You can find more out about the 1 Million Pillowcase Challenge, including 24-Hour Sew-athon details in September, here. Of course, we'll also share a little eye candy with you here!

Pattern #42 is "Hey Cupcake!" shown here using our Cosmopolitan collection. 
Find the pdf pattern for this pillowcase here.
Photo: AllPeopleQuilt.com

Pattern #43 is "Pyramid Band" featuring Linda Carlson and Diana Henage's Imagine This collection. Find the pdf pattern for this pillowcase here.

Inspired? Head over to AllPeopleQuilt.com to check out all the pillowcase patterns, tips and tricks and make some to donate in your town. 

Wednesday, July 23, 2014

Tutorial: Calypso Tote

Happy summer! We're thrilled to celebrate these bright, summery July days with a citrus-inspired tote tutorial from Bethany of Sweet Bee Buzzings using Ro Gregg's Calypso Frogs line. We hope you'll enjoy her tutorial and then head over to her blog to find out how you can enter to win some Calypso fabrics for yourself!

Hi folks! I'm so pleased to be here to share an easy tutorial with you to give a different look to the basic tote bag. My name is Bethany, and I blog over at Sweet Bee Buzzings. I loooove to sew, but bags are my main squeeze--they're generally quick, usually easy, can be customized infinitely, and, most importantly, don't have to fit.

The bag we'll be making is a basic tote where the lining comes over to the exterior to provide some nice contrast and a bit of a faux cuff look. You're probably thinking "Oh, I could make this by cutting some contrasting strips for the outside" and you'd be right, but that's more cutting, more seams, and more bulk (ick! Bulk!). So let's get started, shall we?


Before we get stitching, here are a few quick notes so I don't have to keep repeating myself. First, we're using a 1/4 inch seam allowance throughout. Second, backstitch at the beginning and end of every seam. Third, don't skip the pressing. Pressing is how you get nice professional results with anything, so don't ignore this step. Press every seam you sew.

For this project I used two prints from the Calypso Frogs line by Ro Gregg. You'll need a half yard for the exterior, and about a yard for the lining and straps (you'll have a little left over of both). I also used 2/3 yard of fusible fleece. My fleece of preference is Thermolam Plus Fusible. It gives really nice structure to a bag, while staying soft and playing nicely with that quilted look.

From your exterior fabric, cut two pieces that each measure 17 inches wide by 15 inches high (take care if you're using directional fabrics). From your lining fabric, cut two pieces that each measure 17 inches wide by 21 inches high, and 2 pieces that each measure 5 inches by 32 inches (for your straps). From your fleece, cut two strips that each measure 2 1/2 inches by 32 inches (straps), two pieces that measure 17 inches by 2 3/4 inches, and two pieces that measure 17 inches by 15 inches.


Fusibles need to sit for a little while to let the adhesive set (unless you're going to be quilting them) so I like to do that part first. Take your exterior pieces and the matching fleece pieces and follow the instructions to apply the fleece to the wrong side of your fabric. After it's had time to set you can trim any fleece overhang. Take the smaller fleece strips (NOT the pieces for your straps) and apply those to the wrong sides of the top of your lining pieces, BUT place them 1/4 inch from the top edge of the fabric and fuse.


Let's do the straps. Grab your strap strips and your fleece strap strips. Fold and press your fabric, right sides together, in half longways (think bias tape).


Unfold, and then use that center crease as your guide. Fold in the raw edges to meet at that center crease and press again.


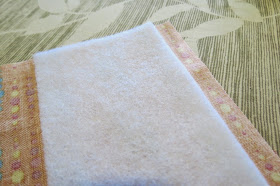
Take your fleece and lay it down the center of the strip (using your most recent creases as a placement guide). I like to then fold over the edges and press it to hold it in place, then flip the whole thing over and press from the side without the raw edges showing more firmly and convincingly.


Then fold the whole thing in half and press again so it looks like giant bias tape with some fleece stuck inside.


Stitch each of the long edges, as close to the edge as you feel comfortable. I go about 1/8 inch in from the edges.


You could certainly leave it be at this, but I like a more quilted look, so I added a few extra rows of stitching. It's your bag, so do what you like. Put those aside.


Grab your exterior pieces that should be nice and fleeced now. You could leave them this way as we used a fusible. But I like quilted bags, so I'm going that route. Decide how you'd like to quilt these pieces. I decided to go with some very simple vertical lines, one inch apart. I use a hera marker to mark my lines, which is one of my favorite sewing notions for projects like this.


Then stitch. I did not use a backing fabric on this as you'd usually do with a quilt. I do this quite often with bags and have never had any trouble, so if some of you are wondering about not backing the fleece and if it's sheer lunacy I assure you it's not necessary and a pox will not fall upon your house :)

Once you do that, let's place the straps. Make sure you're placing them at the top edge if you're using directional fabrics.


As you can see in the photo, I place the edge of my strap four inches in from the side (those clips work great for bulk, but pins are dandy too). I am quite obsessive about my straps being sewn in sturdily so I stitch these down (I actually triple-stitch) inside the seam allowance (between 1/8 and 1/4 inch from the edge). Do this for each strap, making sure they're not twisted.


Now we'll assemble this into a bag. Pin the bottom edges together and stitch straight across. Press open. Then sew up each side and press those open as far as you can. Now we're going to make a nice boxy bottom. If you try to stand your bag up you'll see that the bottom corners want to flop out a bit like a triangle. We're going to flatten those triangles to make our boxy bottom.


If you peek inside the bag you can line up the side seam with the bottom seam by laying them on top of each other. To help keep things flat I like to snip off the tip of the triangle so I can see where the seams line up.


Once you get those seams lined up (and you'll want to take care to do this so things look tidy on the outside), place a ruler across the triangle where it measures four inches. If you've got things lined up right you'll see that the two inch line is smack on the seam--


If things aren't even squiggle things a little until they are. Then pin/clip in place, and draw a line. Stitch across, and then cut off the excess. Repeat for the other corner.


This is what it will look like on the outside:


Now assemble the lining in the same way, making sure the fleece is at the top edge, and that you're leaving a 6 - 8 inch gap in the middle of the bottom seam.


Now we'll organize this mess into an official bag. Place the exterior into the lining with the right sides facing. Pin/clip around the top, and match those side seams


Stitch around the top edge. Before we turn the bag, I want you to pull the layers apart so they look like this:


Press that seam you just sewed towards the top of the bag. That wee gap we left when applying the interfacing to the exterior? That's way cutting down on bulk there. Now, reach into the gap in the lining and pull everything to the right side.


Pull the pieces apart like you did just before we pressed in the last step, and press that seam again.


Now tuck the lining down into the exterior. You can feel where the fleece edge is through the fabric, so use that as your guide for where the top edge will be.


You have a few options here. You could leave this looking like the above (minus the pins of course) where it will have a cuffed look. If you choose this option, I would make sure everything was nice and neat and then stitch in that ditch there to keep the layers from getting wiggly. Or, you could do one line of top-stitching around the top edge. I wanted to keep my quilted look going throughout, so I used horizontal lines in this section, kind of dense but not being too obsessive about perfect straight lines.


Once you finish that, our final step is to sew the gap in the lining closed. Making sure the raw edges are tucked inside, bring together the gap edges, pin, and stitch closed either by machine or hand.


Tuck that inside, give it a final press, and you're finished!


Thanks so much for having me here, Fabri-Quilt. I loved working with these fabrics, and I love my new bag!

Happy sewing!

Thanks, Bethany! Love the tote and your technique!

Head over to Bethany's blog to find out how you can enter to win a fat quarter bundle of the Calypso prints to sew with yourself! 

Monday, July 21, 2014

Illusion Quilting

The most eye-catching designs are those with more than one pattern going on, like this Squares Squared quilt by Sue Harvey and Sandy Boobar of Pine Tree Country Quilts. Featured in The Quilter magazine, this cool design is made using strip sets, so it creates the illusion of woven strips, but it's easier than it looks! The blue and yellow colorway of Ro Gregg's Vibe collection pops on the white background for a refreshing quilt you'll love to use all year round. 
"Squares Squared" by Pine Tree Country Quilts;
featured in The Quilter Aug-Sept 2014


Can you pick out the block in the flat shot of the quilt below?

See the entire Vibe collection here.
Find the kit for Squares Squared here.
Find The Quilter magazine here.


Thursday, July 17, 2014

Exclusive FREE Quilt Pattern

If there's one thing you can never have too many of, it's quilt patterns. 

We especially like this red and black design from Jessica Toye, using Ro Gregg's Vibe and Marblehead collections. 
The best news? We're sharing this modern design as a free download here on the blog! 


Click here to download the pdf of the FREE Woven pattern by Jessica Toye.
Click here to see all of the Vibe fabrics and find another free pattern using this new collection.

Tuesday, July 15, 2014

Feel the Vibe!

We're really feeling the vibe of Ro Gregg's new collection, Vibe, and think you will too! The designs are organic with a contemporary feel, and the colorways are oh-so-appealing. Which catches your eye--the red/black/gray, or the blue/yellow combo?


Q. How did the Vibe collection come to be?
Ro: I wanted to put together something that had a very organic look to it. To make a statement with more texture, multi textural surfaces, something that looks organic yet is geometric as well. It' s a mix of abstract and it can also evoke an ethnic vibe. It's somewhat avant garde in nature.

Q. Which print started it all?
Ro: What started it was the stripe. I worked with the it, putting different components in it. From the stripe I pulled out some of the coordinates. For example, if you look at the red patchwork—it has waves, flowers, and leaves, and that's what I wanted to achieve. Much of the collection is pretty much a play on multi-texutral patterns that have backgrounds to them and working towards an organic feeling.


Q. We love the two colorways you used! What can you tell us about them?
Ro: I started with the rich reds, blacks and grays. But indigos are still so strong, so I picked them for the second colorway. I knew that I wanted to add yellow—the blue and yellow combination is trending back into popularity.
What I really love is that you can cross over the colorways (see the link for the free quilt pattern at the bottom of this post!)—because of that contemporary look. These patterns would look good in anything—they sort of breathe life into the different colors.

Q. Do you have a favorite print in the collection?
Ro: The stripe is a favorite, and the patchwork. The stripe is so optical—all that surface and texture.


In addition to being sold as straight yardage, Vibe is available in red/black/gray and blue/yellow fat quarter bundles;


and 5" squares;

and a multicolor snack pack!

Use the snack pack to make this contemporary lap quilt, 
Lucky 13, designed by Jessica Smith.
Find the free pattern for this quilt here.
See the entire collection here.

Friday, July 11, 2014

Make Home Decor Hues Work for You

Neutrals are always high on the list of home decor hues, but how do you make them sparkle?

The key is a fabulous quilt design, such as the Elements quilt designed by the ladies of The Quilting Hen and featured in Quilt Trends magazine. The rich coppers, silvers and chocolate browns play off a creamy background in this multi-block design.

"Elements" by Diane Arganbright and Patricia Sue Nelson; machine quilted by Shawna Crawford;
featured in Quilt Trends summer 2014


Q. What attracted you to the Elemental Lines fabrics? Why do you think it works so well for a bed quilt?
Patty Sue: The rich, earthy tones of this collection immediately made me think of my Mom, who loves browns, and my Grandma, who loved gray. It is truly a collection that captures both of their personalities and fabric preferences. The elegant yet rustic look of these fabrics definitely belong in a quilt on a bed in a cabin or on a wood four-corner poster bed.

Q. How many different blocks are in this quilt? How did you come up with the layout?
Patty Sue: There are two blocks in this quilt. One of them is pieced as a half block and added to the sides of another block. This adds a new twist to a standard quilt block pattern. The border blocks are a smaller version of the blocks in the quilt center.

Q. What do you like best about the design?
Patty Sue: I like the combination of the pieced blocks and the whole fabric squares. This is a very nice size twin/full quilt that can easily be converted to queen by adding the block border to the sides of the center, making this a very versatile pattern.

Q. What was the most challenging part of designing or making this quilt?
Patty Sue: Designing this quilt was fun. The most challenging part of this quilt was the 36 hour deadline to get it cut out and pieced for the magazine!

Q. Can you tell us about the coordinating pillows?
Patty Sue: The pillows are the large and medium size of the same block pattern from the center of the quilt. I just used scraps from the top to make them and followed the block cutting and piecing directions from the quilt top.

Q. How is it machine quilted?
Patty Sue: The quilting is very elegant and ornate, which adds a nice classy touch to the quilt. The large feathers in the center cream are an eyecatching and very pleasing touch. Our long arm quilter, Shawna Crawford, did and outstanding job, as usual.


See the entire Elemental Lines collection here.
Find the kit for this quilt project here.
Find this issue of Quilt Trends here.